Back to the PNW – Olympic National Park

I used to think that going six weeks in between blog posts was a long time, but now it has been five months since my last post! Life has been incredibly busy lately, and while I have started writing several new posts, I have not been able to finish one.

We have had a couple exciting adventures since my last blog post in February – we spent some time in Los Angeles, Jaco (in Costa Rica), on Vancouver Island, and most recently in Olympic National Park in Washington. I am going to share all my thoughts about Olympic National Park now while everything is still fresh in my head!

Olympic National Park is around a four-hour drive from where we live, making it a great option for a quick weekend trip. This is our 9th National Park visit in the United States, and it definitely did not disappoint! I actually bought a scratch off poster last year to track all the parks we have been to, but I am currently behind on this activity (being behind on things appears to be a common theme in my life right now…).

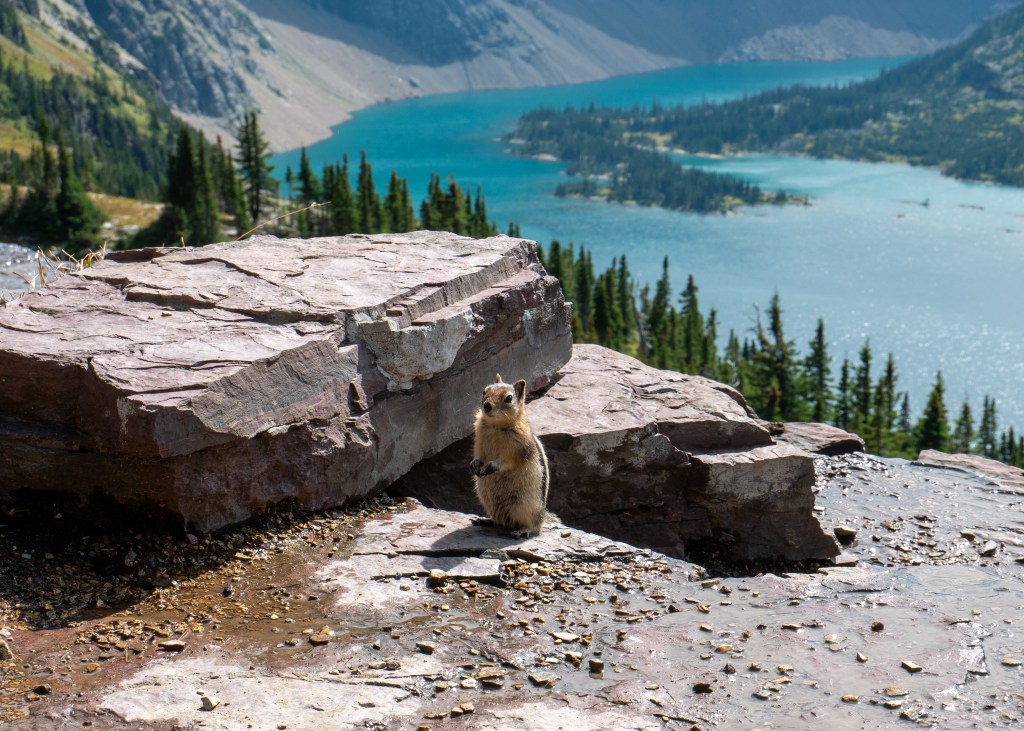
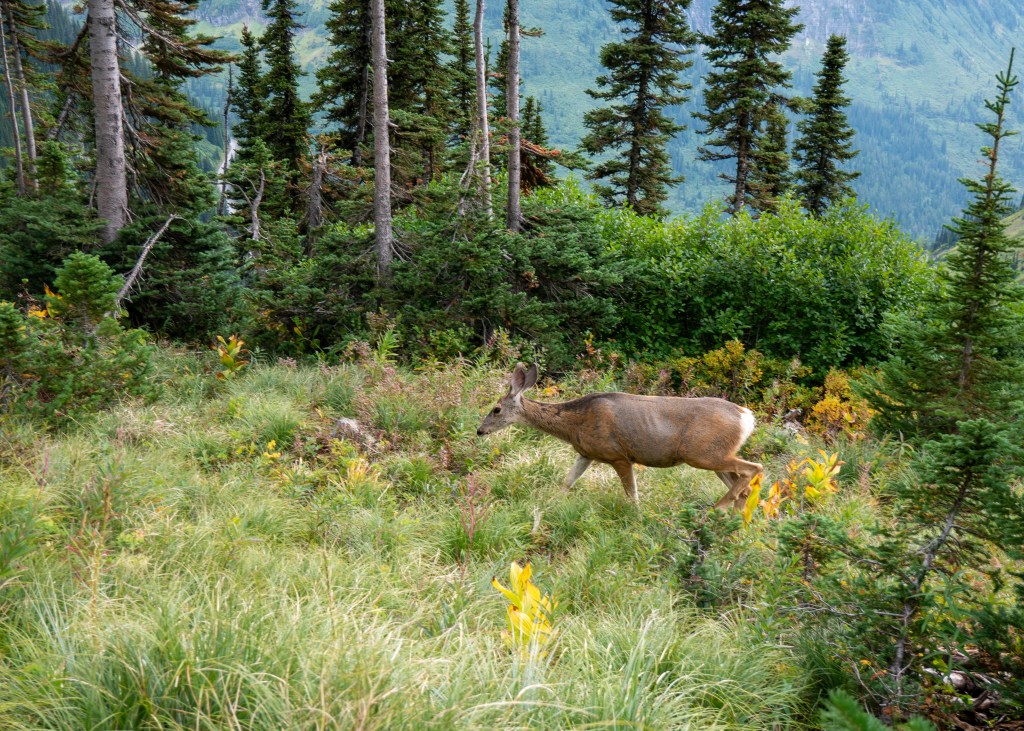
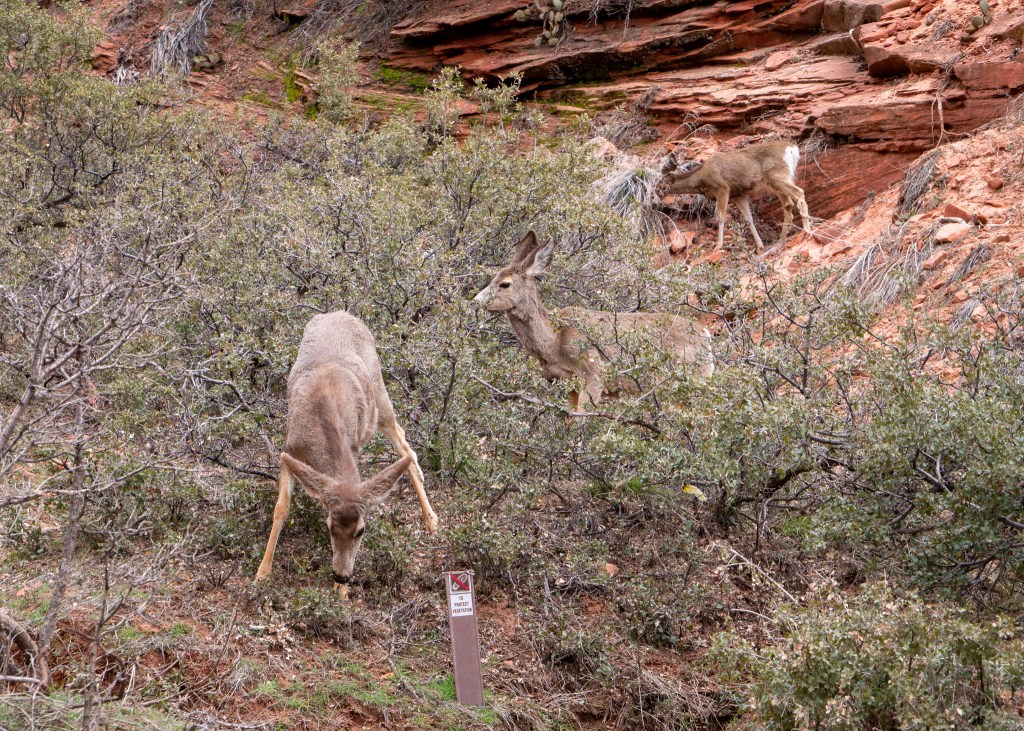
In order to explore Olympic National Park, we decided to stay in Port Angeles, which is the largest city near the park. We stayed in an Airbnb in a quiet neighbourhood with our friends, Iwona and Craig. The highlight of this location for me was all the deer (including the babies!) roaming the streets and nearby trails.

We did not spend too much time in Port Angeles, itself, but here are some notable shops and food establishments we checked out:

  • Our favourite restaurant was New Day Eatery. While I did not try the coffee here, I was advised by Justin, Iwona and Craig that this was their favourite coffee stop of the trip. New Day Eatery also had several plant-based (and gluten free) baked goods – it was actually difficult to make a decision due to all the options! Different scones, muffins, coffee cakes… if only calories were not a concern. We also had breakfast here on our last morning, and it was delicious.
  • A shoutout to Westside Pizza for offering vegan cheese – loved the vegetarian pizza option!
  • We all picked up our local swag at MOSS. I usually try to limit myself to one item, but I could not make a decision (apparently another common theme in my life). I ended up getting the Washington Nature Checklist t-shirt, and Iwona and I are also the newest members of the Out of Breath Hiking Society with our new hats. If you are hoping to pick up some Pacific Northwest gear, definitely stop by MOSS.
  • While we did not make any purchases, we enjoyed browsing the gift items, games and books at Port Book and News.

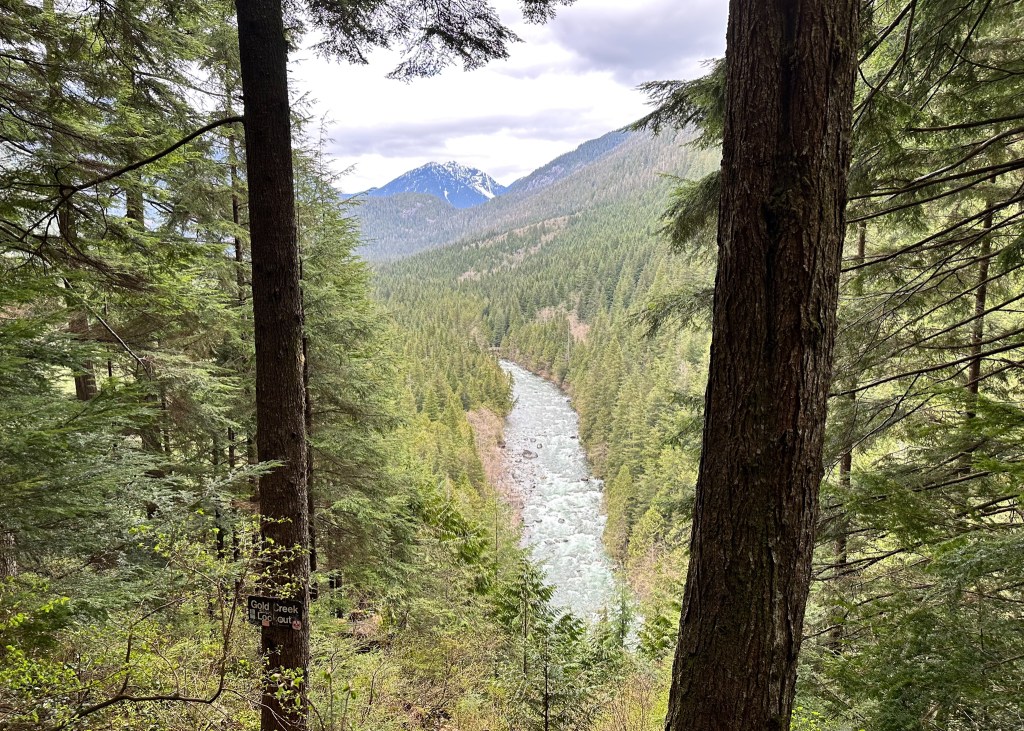
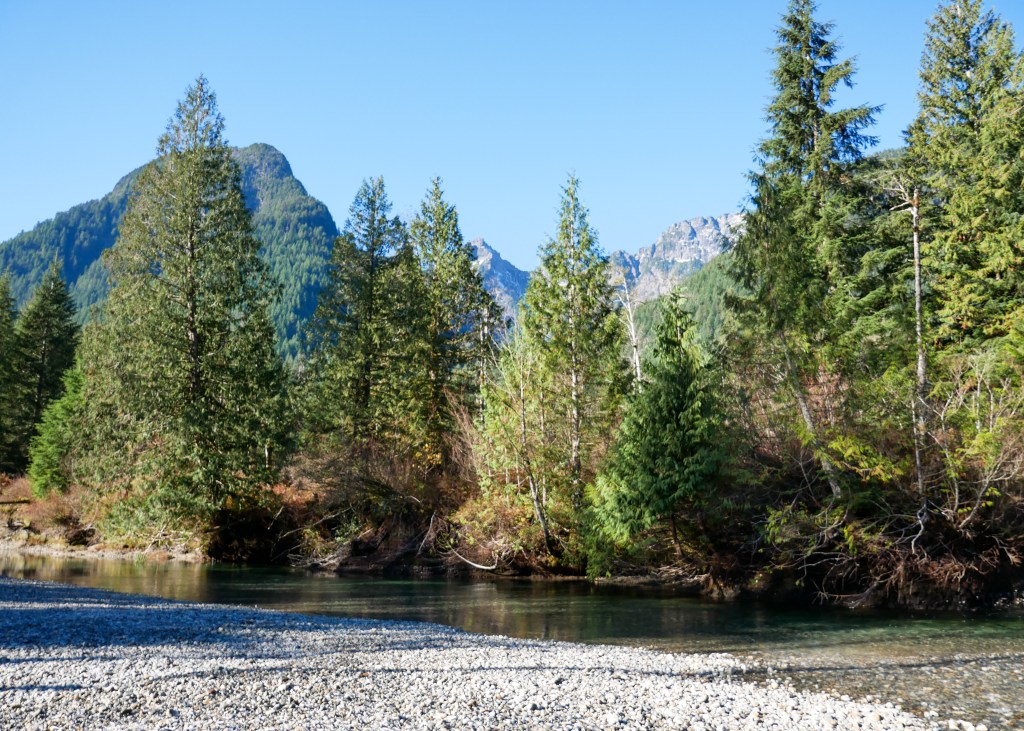
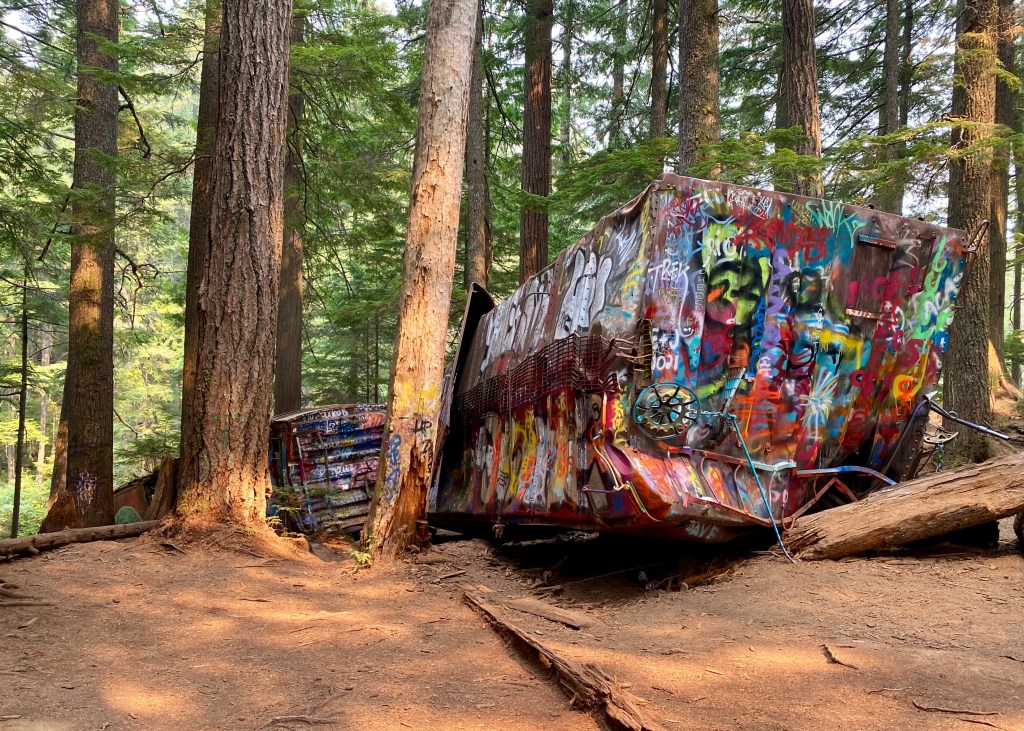
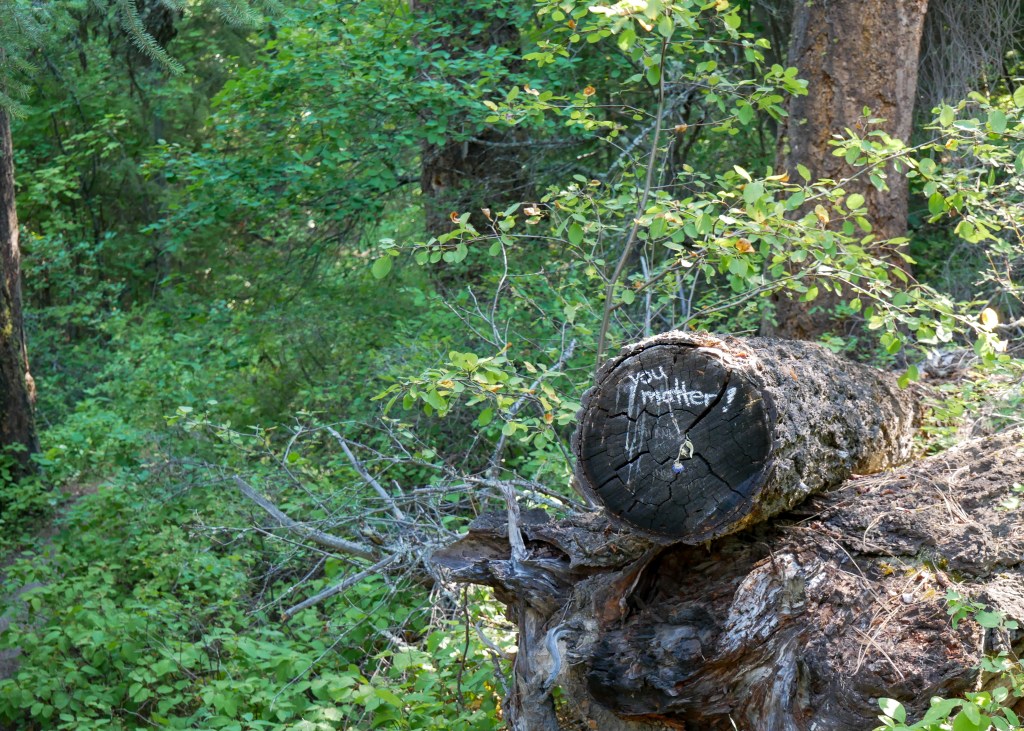
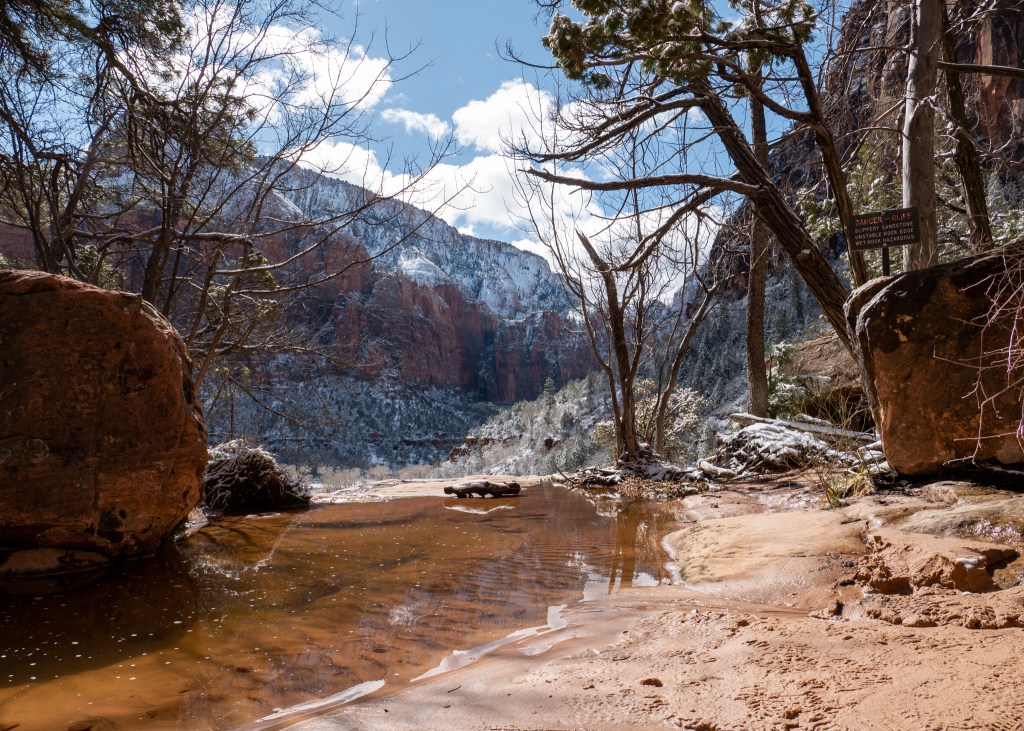
We essentially had two full days to explore the park, plus some time in the evening the day we arrived. One thing that makes Olympic National Park unique is its diverse ecosystem which is made up of the coast, forests and mountains. Since our daylight was limited on our first (partial) day, we settled on exploring a shorter trail amongst the forests – the Marymere Falls Trail.

This was a very peaceful and easy hike – we loved walking amongst the tall trees, breathing in the fresh air and listening to the water flow in the nearby creek. I would definitely recommend doing this hike later in the day if this is an option for you, as the light scattering through the trees onto the trail was beautiful.

Marymere Falls

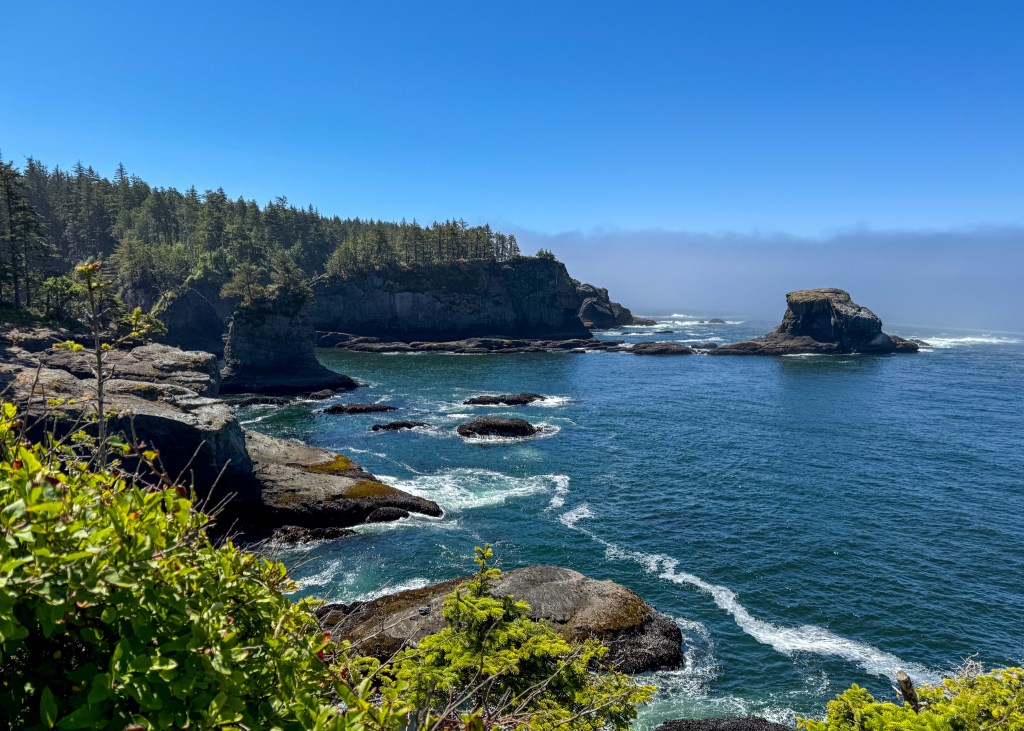
Moving onto our first full day at the Park, we decided to drive out to the Washington coast to explore the beaches that make up Olympic National Park. Our first stop was at Cape Flattery, which was around an hour and 45 minutes from Port Angeles. Note that this area of the park is managed by the Makah Indian Tribe and visitors must pay an additional $20 USD entrance fee, on top of the National Park fee. In order to reach the beautiful cliff overlooking Neah Bay, you have to walk along a short, tree-covered trail – the trail out-and-back is less than 2kms. There are a couple of different view points once you get to the end, and all of them are spectacular!

The views from Cape Flattery

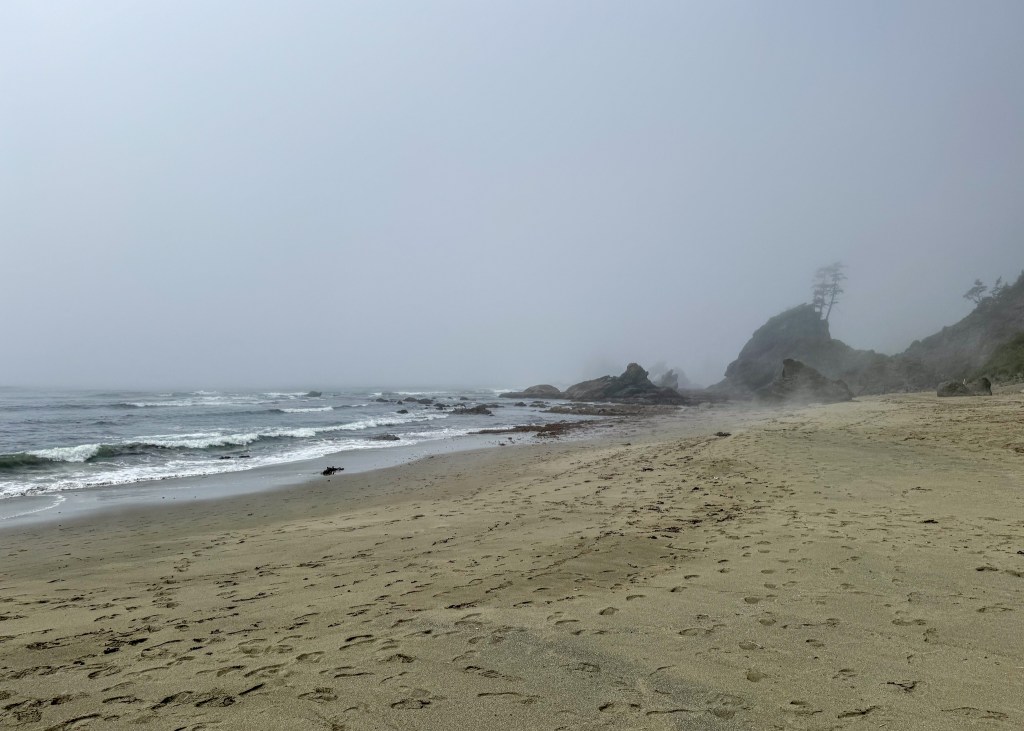
Our next stop was Shi Shi Beach, which was a 20-minute drive south from Cape Flattery. On AllTrails, you will find a 14km Shi Shi Beach Trail, but to actually get to the beach, it is around 3.5km. The trail to the beach was through the forest, and it was more muddy than we expected – I would definitely recommend hiking or waterproof shoes for this trail… leave your white sneakers at home ツ. Craig had actually seen a sign in the beach parking lot that made reference to the number “0.6,” leading us to believe this trail was 0.6 miles. You can imagine how surprised we were to have walked a total of 7km (out-and-back). But, upon returning to our vehicle, we realized the 0.6 miles was actually referring to the next parking lot for campers – oops!

While Shi Shi Beach appeared to be a beautiful spot, we were very limited in what we were able to see, as there was a lot of fog and low cloud coverage – I actually kind of enjoyed the eerie atmosphere ツ.

A moody version of Shi Shi Beach

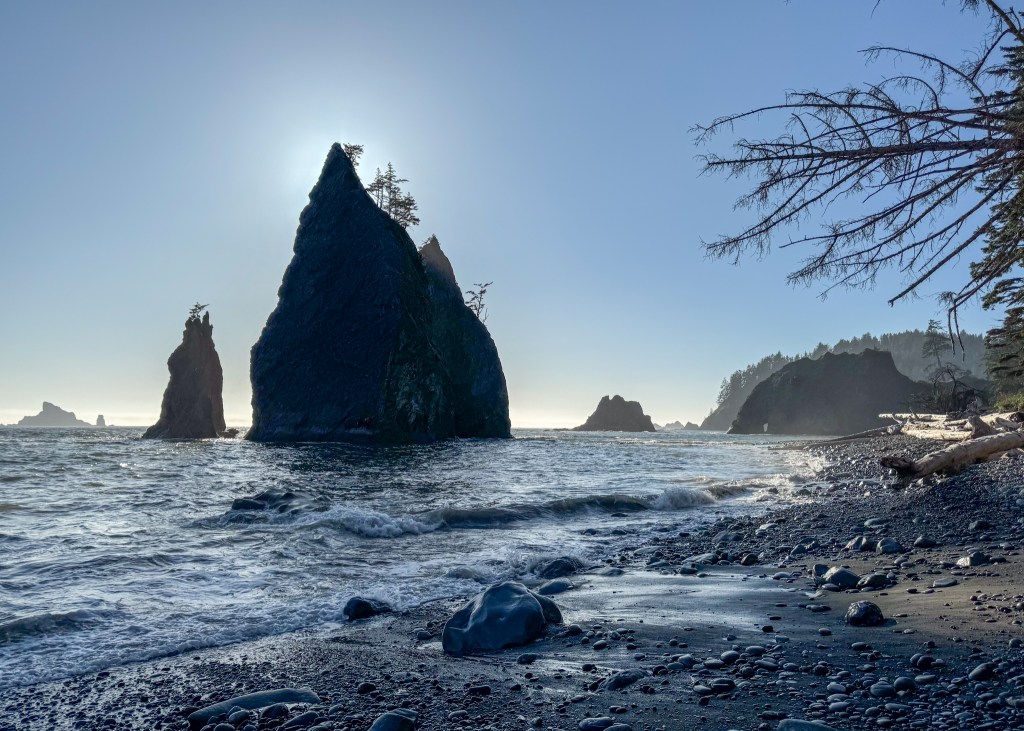
Our final destination along the coast was Rialto Beach. This Beach was about an hour and 20 minutes away from Shi Shi Beach, and was just outside the city of Forks. Many people are familiar with Forks, as this is where all the Twilight movies were filmed – I personally had no idea as I am not a Twilight fan. Even though the series was filmed over 15 years ago, the town is not shy about capitalizing on this moment – you can find vampire swag in the shops in Forks, and the town refers to itself as “Home of the Twilight Saga.”

Blood-sucking mythical creatures aside, Rialto Beach is easily the nicest beach I have ever seen. When we initially got here, similar to Shi Shi Beach, it was quite foggy and actually very cold and windy! Have I mentioned that Justin did not bring a sweater or jacket on this trip ツ? Our plan was to walk along the beach towards the Hole-in-the-Wall rock structure (which is located about 2.5km one way from the parking lot), but unfortunately, the tide was too high and we did not make it to the end – but, we still got pretty close!

However, during our walk, the fog lifted and we were able to see the beach for miles – it was beautiful. My favourite part about this entire experience was the abundance of drift wood along the beach, which made for very cool photo opportunities, as well as the pelicans flying along the coast and diving for fish! Although, one thing I was surprised about was how tired I was from this walk – 5kms through the sand and rocks is no joke!

Rialto Beach after the fog lifted, featuring some pelicans!
Another photo of Rialto Beach – can you spot the Hole-in-the-Wall we were trying to reach?

After finishing up at Rialto Beach, and grabbing a bite to eat at Blakeslee Bar and Grill, it was time to drive back to Port Angeles, which was about 1 hour and 20 minutes away. Needless to say, we did a lot of driving on this day, but it was definitely worth it!

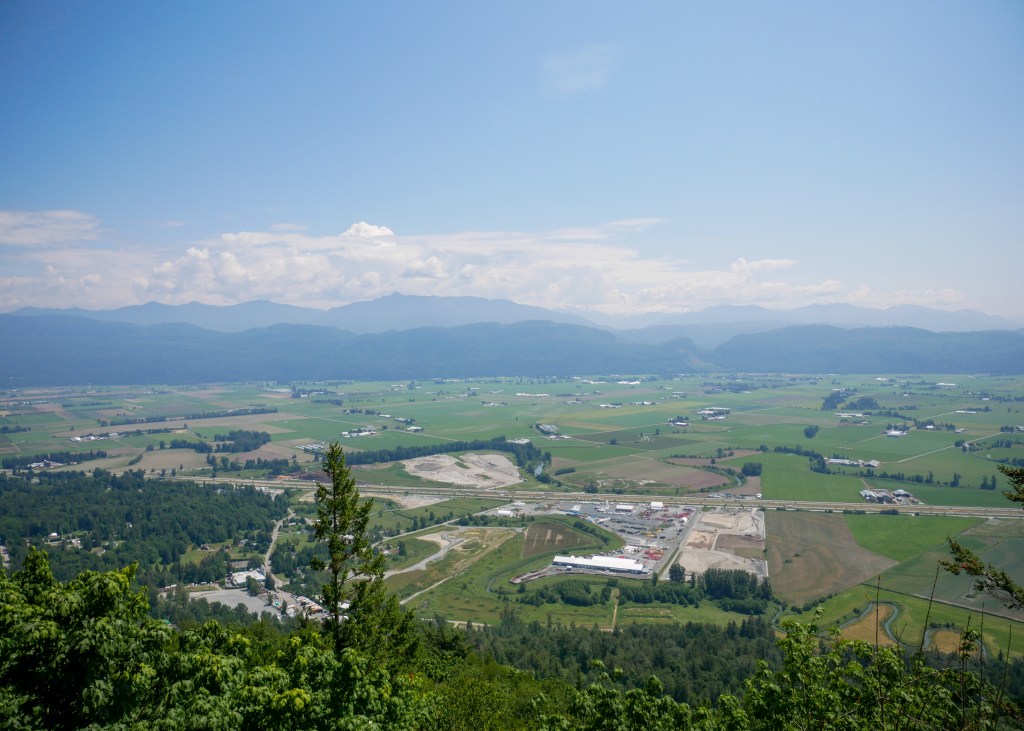
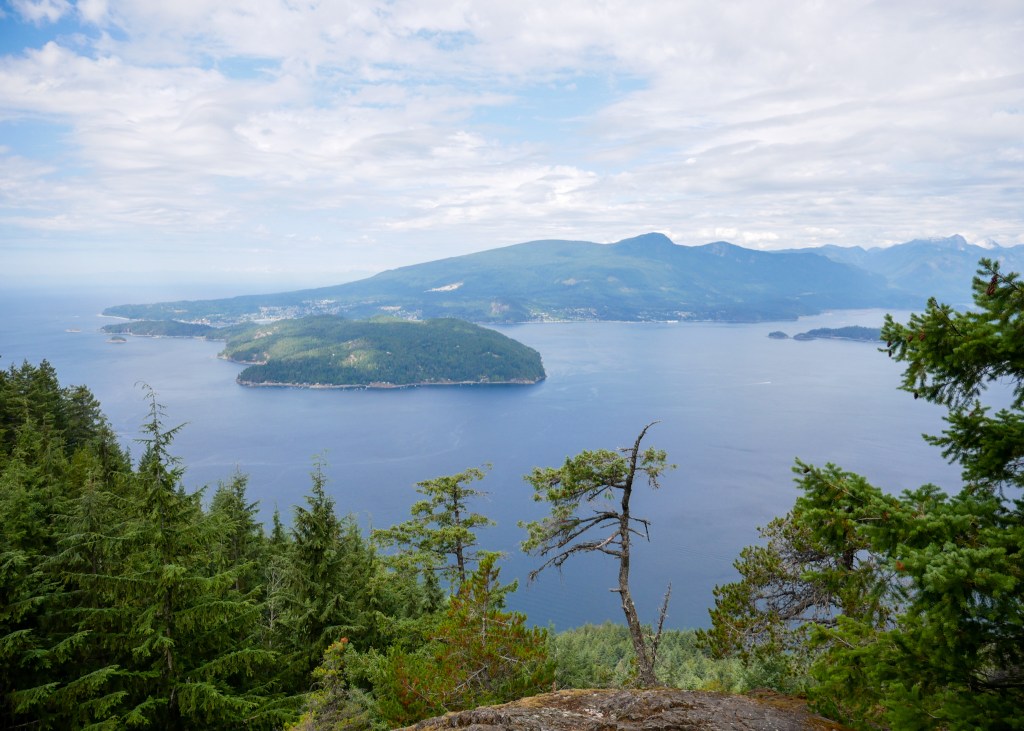
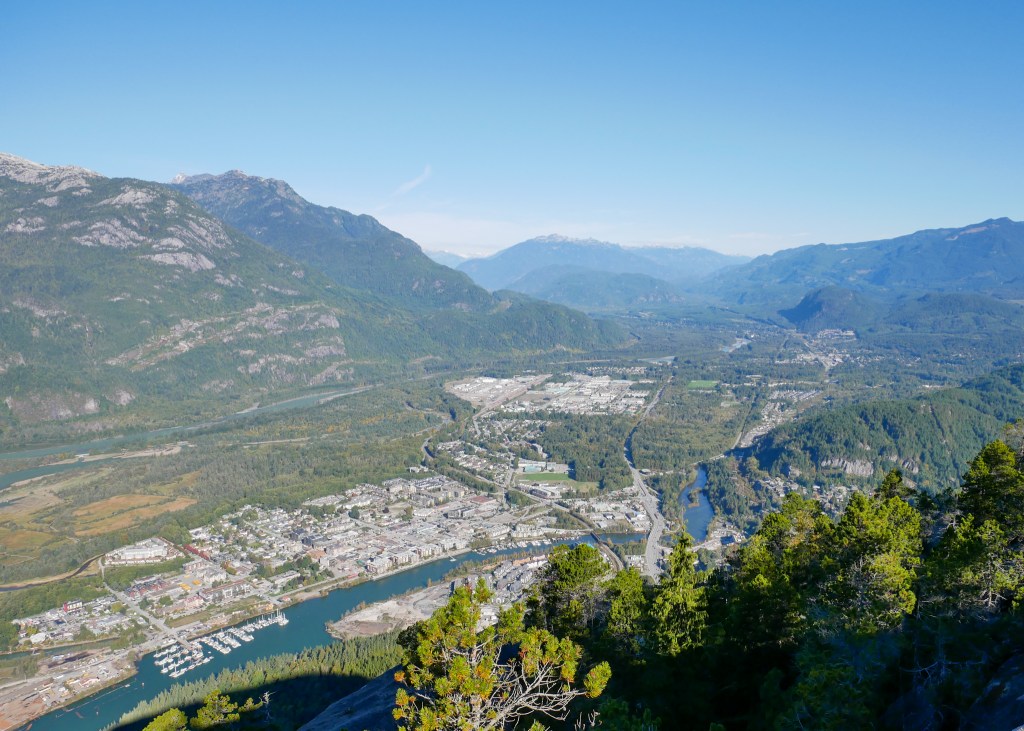
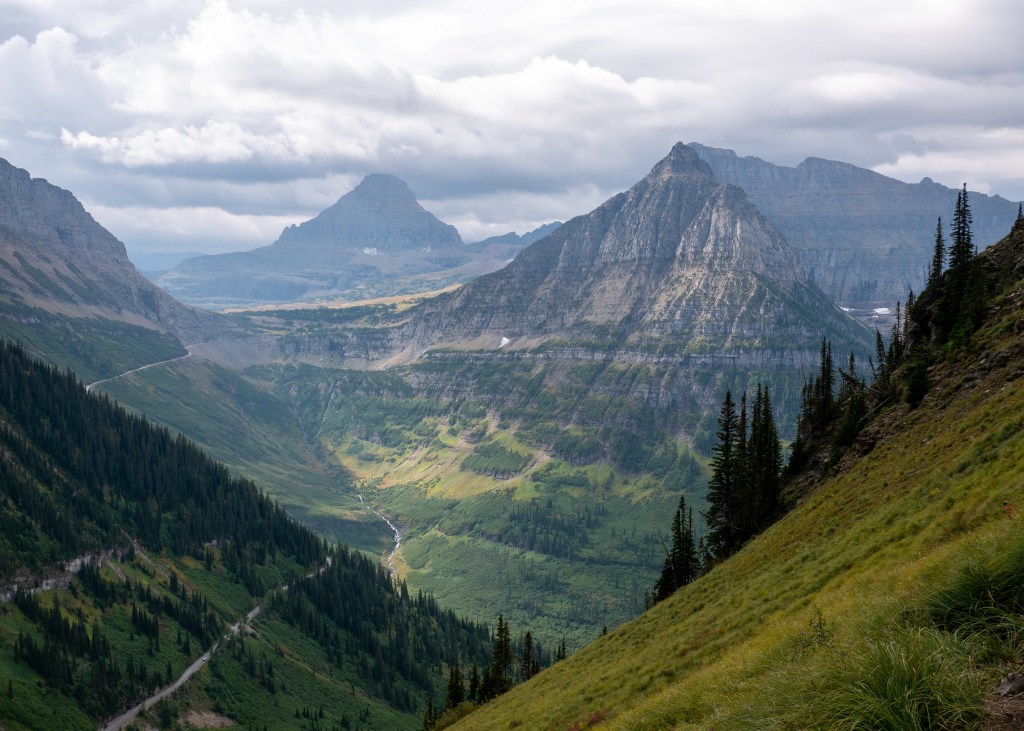
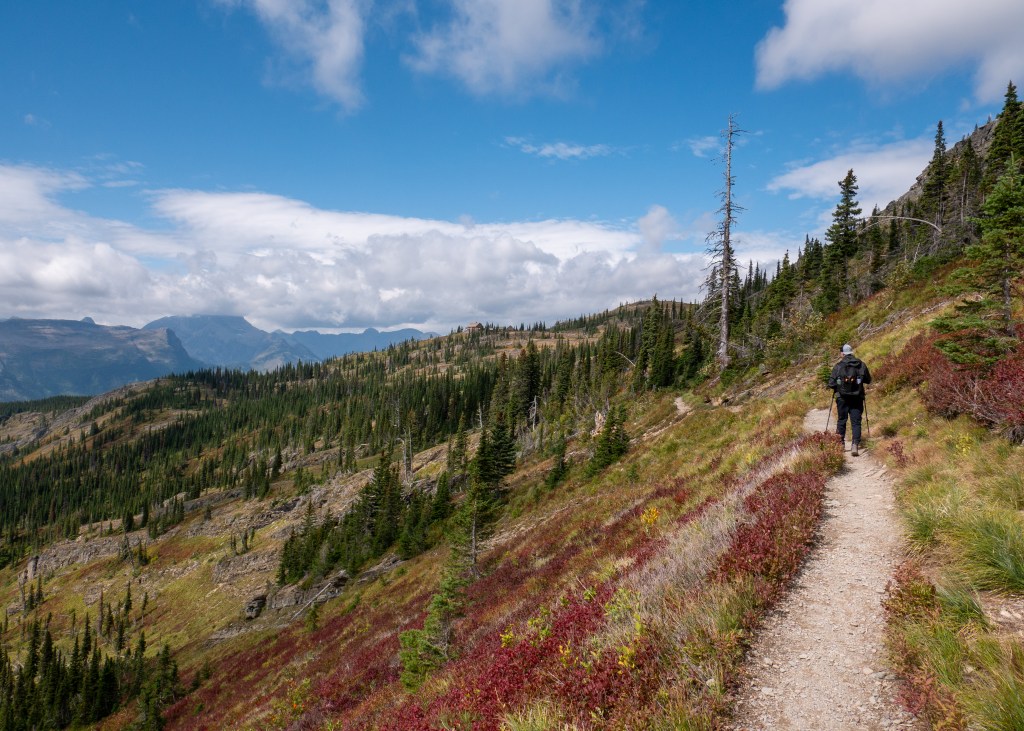
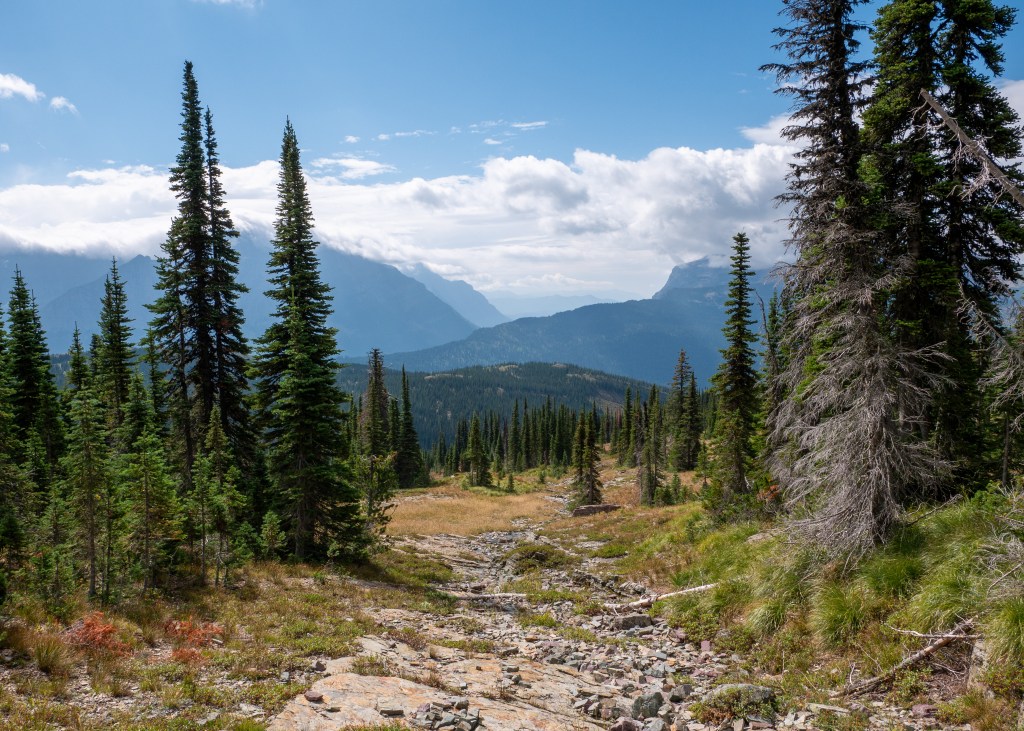
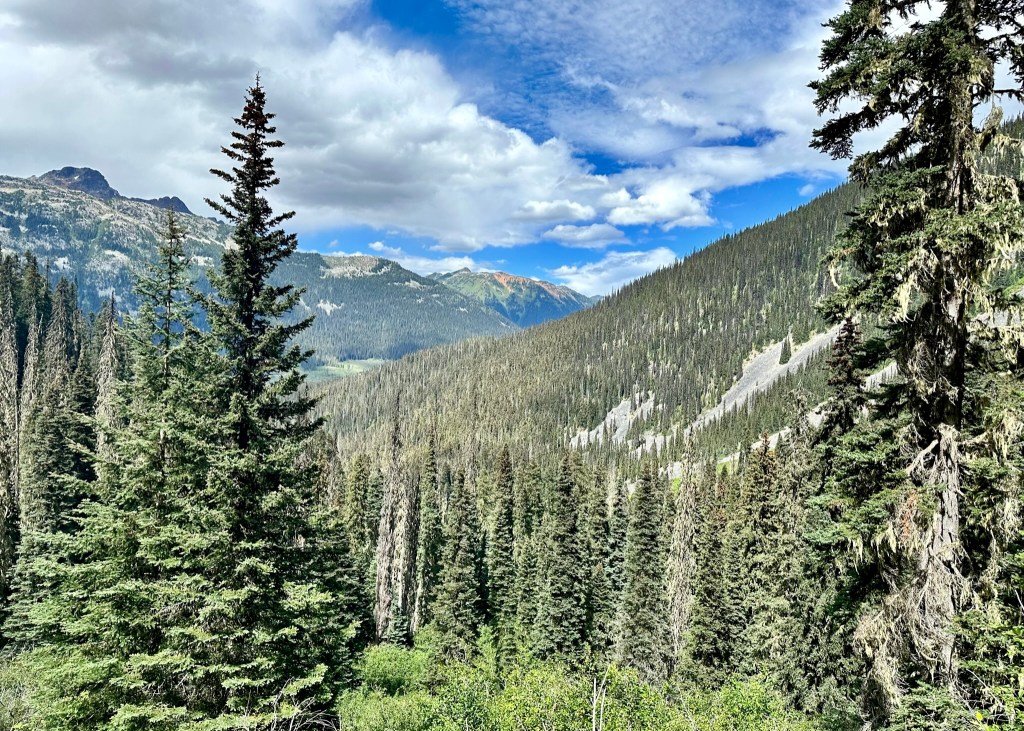
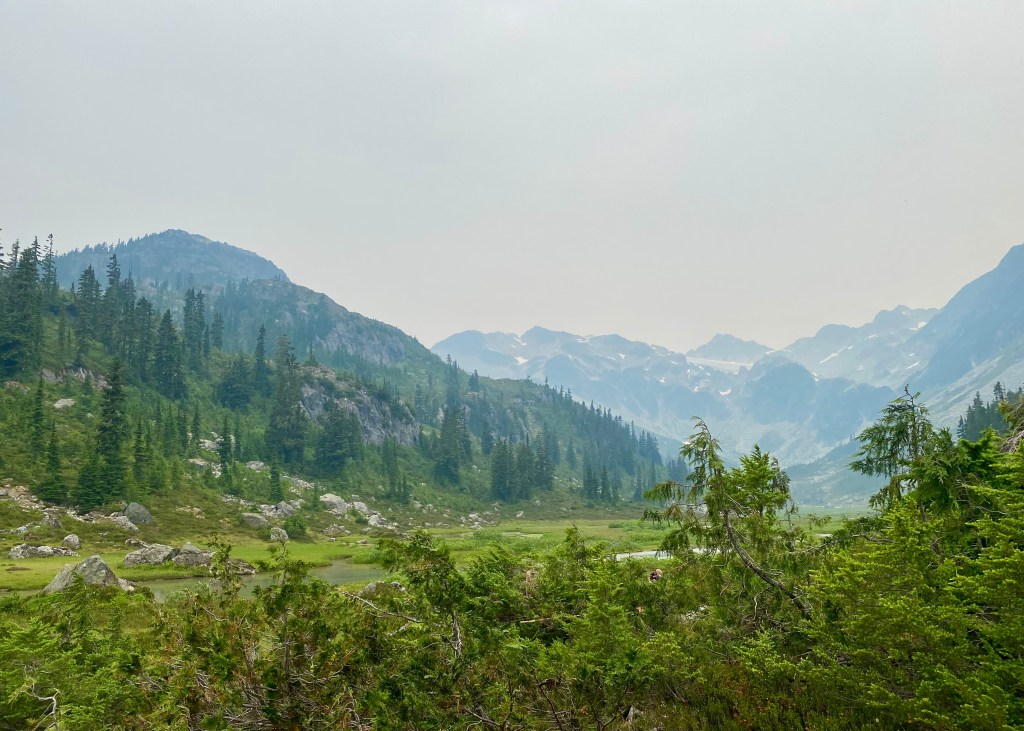
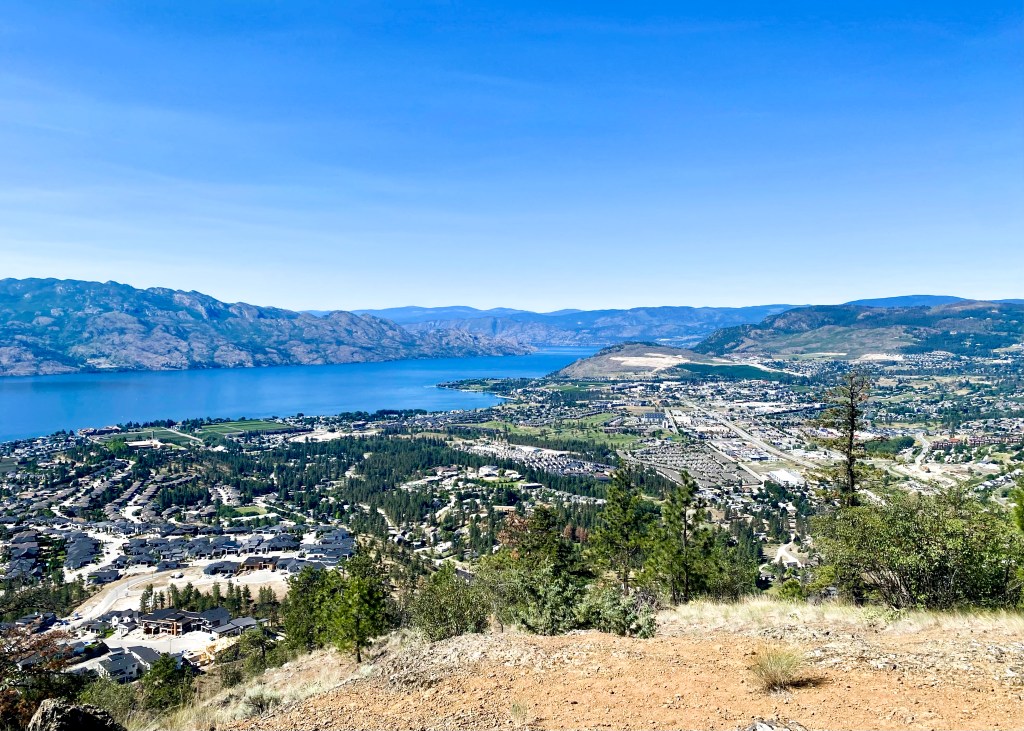
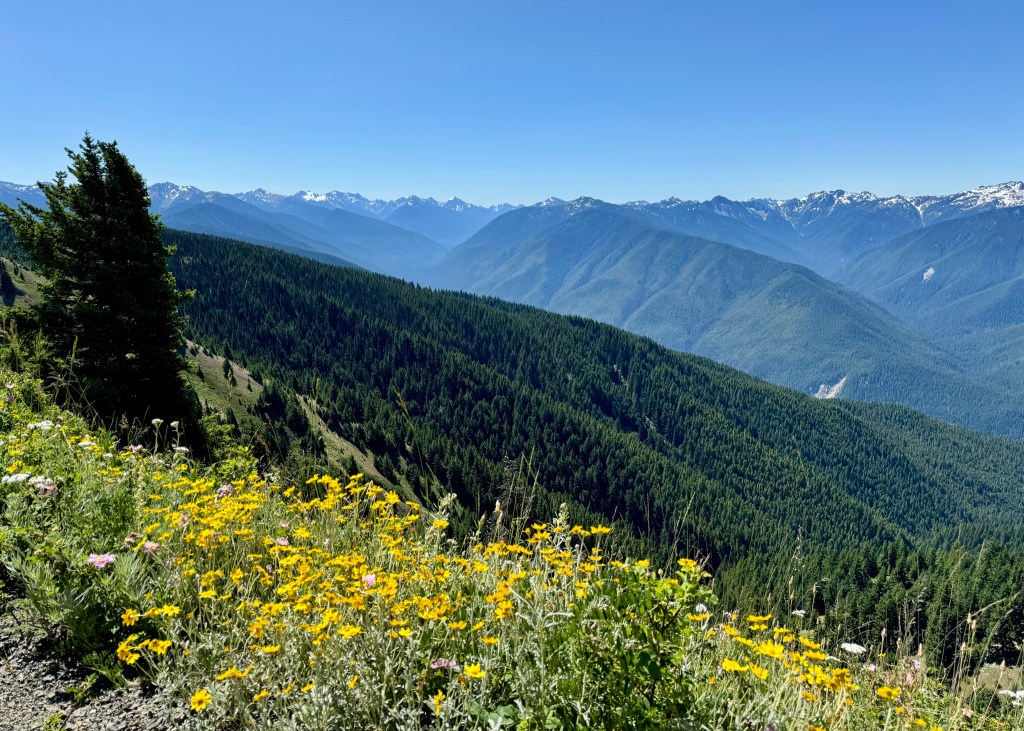
After touring the forests and coast, the last ecosystem we had left to explore within the Park (and it was also our last day) was the mountains, and our trail of choice was Hurricane Hill via Hurricane Ridge. In order to get to this trail head, you need to drive about 40-minutes through the park along a switchback road, up to an elevation of 5,252ft. Note that there are only three small parking lots near the start of the trail and they fill up quickly – we arrived around 9:30am and had to park at the furthest lot.

Despite the limited parking situation, I cannot say enough good things about this trail. The picturesque mountains, the colourful wildflowers and the views of Vancouver Island from the top were incredible. If you only have time for one hike in the park, I would put this at the top of your list!

Views from the top of Hurricane Hill – can you spot Mt. Baker?
Mountain views and wildflowers along the Hurricane Hill via Hurricane Ridge trail

In terms of difficulty, I would rate this hike as moderate – while it is fully paved, there is an elevation gain of 252m over 2.75km, which results in some steeper sections along the trail. If you struggle with downhill, I would definitely recommend bringing some hiking poles. The trail is also fully exposed – there are very few trees to provide shade.

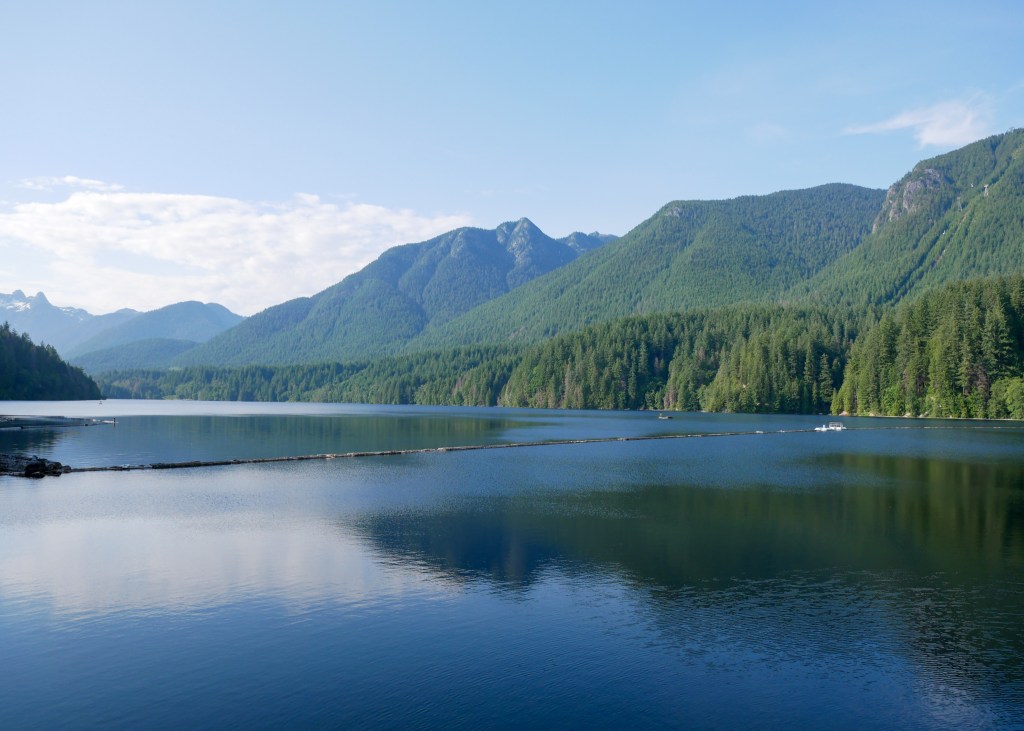
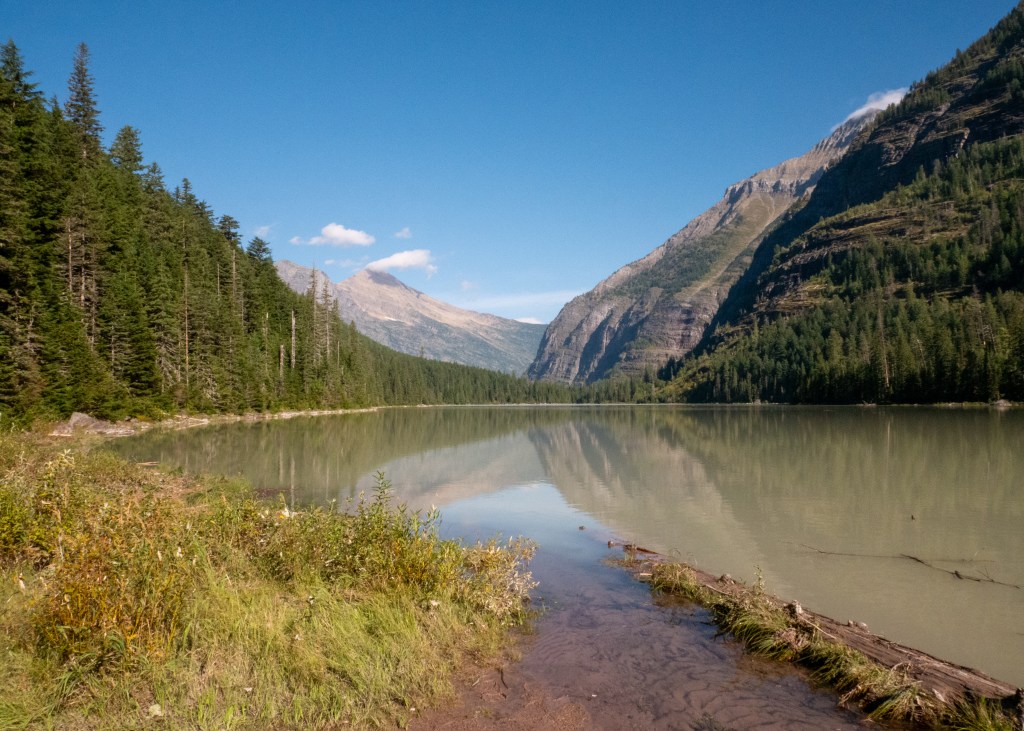
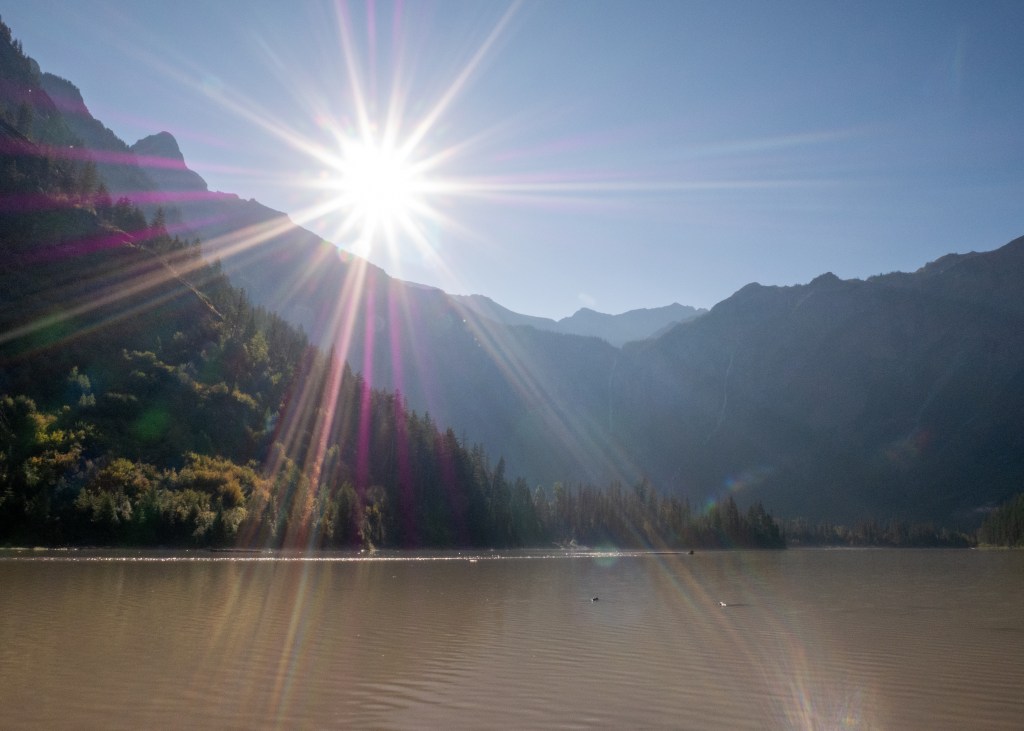
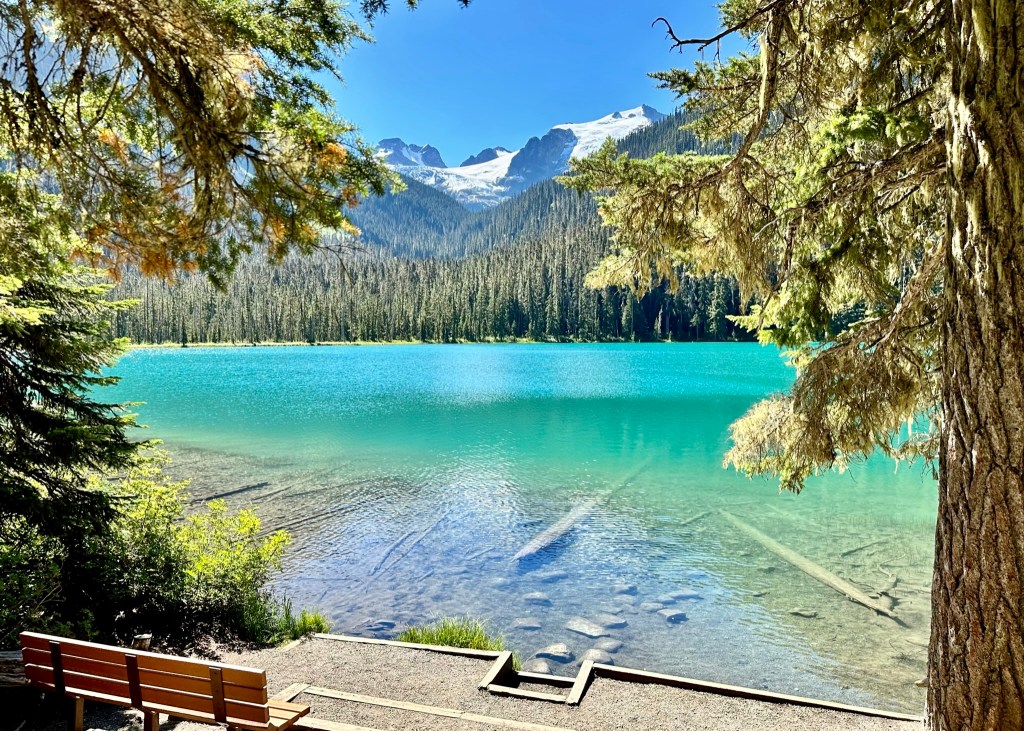
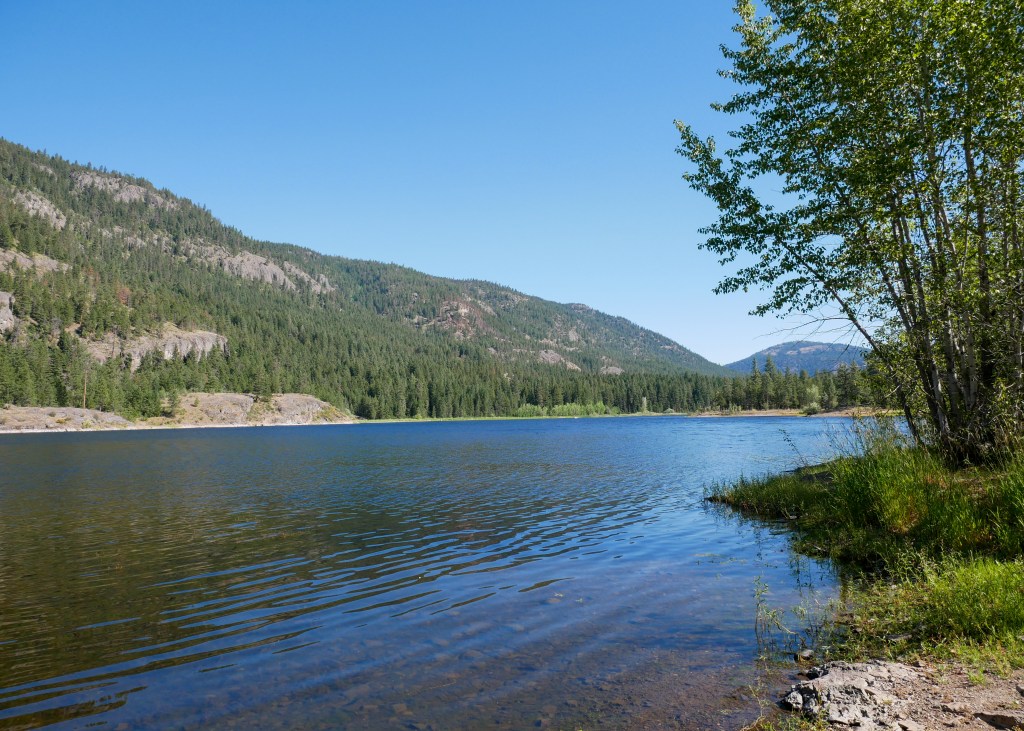
After taking a lunch break to watch the EuroCup Final, we decided to finish our day in the forest with an easy walk around Crescent Lake along the Spruce Railroad Trail. We did not have enough time to complete all 18km, but we enjoyed the first part of the trail, stopping to sit by the lake to take in the Olympic National Park views one last time.

Views of Crescent Lake

Overall, we are very happy with our time spent in nature at Olympic National Park and we are already starting to plan our next National Park visit! Where should we go?

On a completely unrelated note, I am thinking about starting an Instagram account to showcase some of my travel photos. What do you think – should I do it? Do I have time, or will it just become another activity I am behind on ツ?

Until next time!

Always grateful,

Michelle

The Pacific Northwest

Back in November, Justin and I had the chance to spend an extra long weekend doing some exploring in the beautiful Pacific Northwest with our friends Iwona and Craig. Specifically, we spent time down in Washington in Leavenworth and Wenatchee.

The drive from the Canadian border to the Wenatchee/Leavenworth area is around 4-hours, but we managed to stretch this into a 7-hour drive by making several stops for lunch and coffee, and at Trader Joe’s.

One thing I have never mentioned in any of my previous blog posts is that when we are travelling in the US, we try to book accommodation with a kitchen (or at least a decent sized fridge) as our very first stop in every new city is Trader Joe’s. We always stock-up on the premade salads, wraps and snacks as this helps to keep the food portion of our trip cost effective, and it helps us eat healthier. Well, our trip down to Washington was no different ツ!

We ultimately had two full days in Wenatchee and Leavenworth, and during this time, we were able to fit in two hikes, as well as some time to explore the nearby towns and shops. Our first hike was a trail surrounding Clara Lake and Marion Lake in the Okanogan-Wenatchee National Forest, which was around 30-minutes from our accommodation in East Wenatchee. The reason we picked this hike is because some reviews we read suggested we might still be able to see larches in the area, even though it was already mid-November.

Well, to our surprise, we did find larches on our drive to the start of the trailhead, but there were definitely no larches on the trail, itself, as it was covered in snow! Fortunately, we showed up prepared with crampons and ice cleats to help us enjoy our hike through the winter wonderland.

The larches we saw when driving to the Clara and Marion Lakes trailhead

As we were hiking along the trail, we remained hopeful that there might be more larches at the end of the hike. We decided to ask the first person we encountered whether there were larches by the lakes, and he laughed and said “sure.” He either did not know what larches were, or we missed the sarcasm in his response – he definitely got our hopes up! Either way, we will have to go back to this trail one day, hopefully a bit earlier in the year to see the larches and to see Clara and Marion Lakes without all the snow.

Up close and personal with the larches!

The other trail we did was the Icicle Gorge Trail, which is also part of the Okanogan-Wenatchee National Forest. This trail was actually closer to Leavenworth, and was around an hour away from our accommodation. To our surprise, the entire area surrounding the trail was surrounded by larches! I later learned that there are actually multiple types of larches, and I believe the ones we saw were western larches, which can be found in lower elevation areas (compared to alpine larches, which grow at high elevations).

While I would definitely consider the Icicle Gorge Trail to be an easy nature walk, it was a stunning walk along the river – I would highly recommend putting this on your must see list when visiting Leavenworth.

Icicle River along the Icicle Gorge Trail
Larches surrounding the Icicle Gorge Trail

Other than our time outdoors, we also made a point of checking out the local restaurants in the area. While we were in Wenatchee, we went to Wenatchee Valley Brewing to enjoy a local beer and some snacks, and also checked out Tap and Putt, which offers games and indoor mini-golf in addition to food and drinks. We ended up playing shuffleboard, and also three rounds of Monopoly Deal (which I brought from home), and we could not believe that Craig won every single game. It would not be incorrect to say I get a little bit competitive when playing Monopoly Deal.

In terms of eating establishments in Leavenworth, we enjoyed a Mexican lunch at South Leavenworth, dinner and live music at Yodelin (I definitely regret not trying one of their soups) and played a couple more rounds of Monopoly Deal over a drink at the Icicle Brewing Company. While I was not able to completely redeem myself over Monopoly Deal this time, thankfully I won one game ツ.

Views from the town of Leavenworth – on the left is one of the Bavarian-style buildings

I should note that our trip to Leavenworth was during the shoulder season and I would love to visit again one day in the winter. In case you did not know, Leavenworth goes “all out” for Christmas – thousands of decorative lights, live music, carolers and, of course, a special appearance from Santa, himself.

I know this was one of my shorter blog posts, but hopefully it gives you some ideas on what to do if you are ever visiting Wenatchee or Leavenworth!

Always grateful,

Michelle

More Time in the Desert

If you have been reading my other blog posts, you will know that we have previously spent time in both Palm Springs and Scottsdale, hence why I am titling this blog post “More Time in the Desert” ツ. We have recently been on two separate trips to Indio, California – the first visit was in October 2023, and we just got back from our second visit earlier this week!

October 2023

I will start by saying that our first trip to Indio was a hot one – even in October, the weather was over 35°C every day! When it is this hot out, your only opportunities to spend time outside are early in the morning and later in the evening. But, we did not let this stop us from exploring outdoors!

For our first full day, we drove out to Palm Springs (which is around 30-minutes from Indio) to check out the Indian Canyons. The Indian Canyons are actually made up of multiple canyons – Palm Canyon, Andreas Canyon and Murray Canyon. Because it was already quite warm out, we opted to start in the Palm Canyon and complete a shorter (fairly easy) hike called Victor Loop, which provided some shade as the start of the trail is almost entirely covered by palm trees. However, the second half of the trail was completely open – the true definition of a desert landscape! This short hike provided fantastic views of Palm Springs and its iconic turbines, and we even saw some desert bighorn sheep.

Views of the palm trees from the top of the Victor Loop
One of the desert bighorn sheep we saw along the Victor Loop

Apparently the rule for hiking in the desert is: once you have finished half your water, turn around and go back! Makes sense to me!

After we finished the Victor Loop, we drove to Andreas Canyon to do the Andreas Canyon Trail. Fortunately, this trail is only 1.5km long, and similar to Victor Loop, it is surrounded by palm trees. The short distance and shade made this walk tolerable in the heat; however, it is important to be prepared – sunscreen, hats and water are critical!

The other hiking we did during this trip was in Mount San Jacinto State Park. In order to access these trails, we took the Palm Springs Aerial Tramway. The Tramway is located about 40-minutes from Indio, and it is similar to a gondola but it spins as it goes up, providing you with 360° views of Palm Springs. Once we reached “Mountain Station” and stepped into Mount San Jacinto State Park, it was clear we had left the desert – the temperatures were about 10°C lower than what we were experiencing in the valley, and the Park had a luscious green landscape.

We started by hiking the Round Valley Trail. Because this hike is slightly longer (4km), you are required to stop by the Ranger Station to grab a permit to complete this hike. The Ranger assesses your ability to hike the Round Valley Trail, primarily by checking if you have enough water to drink (remember the rule I mentioned above?).

While there were not that many view points along the Round Valley Trail, it was a very peaceful walk through the wilderness, with beautiful fall colours!

Fall colours along the Round Valley Trail

The second trail we did was the Desert Valley Trail. While only 2km in length, this trail provided stunning views of the surrounding mountains and valley below. The Desert Valley Trail was definitely more scenic than the Round Valley Trail, but overall, we very much enjoyed our time in Mount San Jacinto State Park! As a side note – a big shout out to the tramway operator we had on our way down – he told jokes and had everyone singing along to Sweet Caroline.

Views from the Desert Valley Trail

In addition to the little bit of hiking we did in October, we also went back to Joshua Tree National Park. Our first visit to Joshua Tree National Park was in December 2022, which I wrote about in my Palm Springs & Joshua Tree National Park (Southern California – Part 1 of 3) post! But this time, we went to the Park at night for stargazing.

Joshua Tree National Park is considered an International Dark Sky Park, and let me tell you, it is very dark at night. It took us about an hour to drive from Indio to the spot where we intended to stargaze – the Ocotillo Patch within the Park. I will admit that we know very little about stargazing and were very unprepared. When we arrived at the Ocotillo Patch, there were other stargazers already there with their folding chairs, blankets and red lights – we did not have any of these supplies! We read that it takes about 30-minute for your eyes to adjust from bright lights, whereas red light does not impact your night vision in the same way. Either way, we were amazed with how many stars were in the sky, and we were even able to see the Milky Way. I am excited to try stargazing again in the future, but this time, with all the proper equipment!

The night sky in Joshua Tree National Park – this photo does not do the sky justice!

The final activity we were able to fit in during our visit in October was the Palm Springs Windmill Tour, which allows you to get up-close and personal with the wind turbines. We opted to do the self-driving tour option, where you drive through the different exhibits while listening to an audio track (through a phone app). There are 10 exhibits that discuss the history of the turbines, the different sizes, and you also drive past a solar farm. My favourite fact I learned is that there are various reasons why a turbine might not be spinning in the wind – a couple more obvious reasons like the turbine is down for maintenance or there is not enough wind, but apparently too much wind can also be a bad thing!

Palm Springs turbines

Other than that, the rest of our time in Indio was spent relaxing by the pool and hot tub. We were also sure to visit a couple of food spots in Palm Springs that we enjoyed during our last visit – Sammy G’s, for pizza and pasta, and Nature’s Health Cafe, for delicious smoothies!

January 2024

Earlier this week we got back from another trip to Indio. While not as warm as our October trip, the temperatures were between 15-20°C, which was the perfect temperature for hiking and hanging out in the hot tub. I appreciate the temperatures even more now given that it is -13°C (feels like -23°C) in Vancouver as I am writing this blog post!

Our friends, Jeanette and Mike, actually joined us for this trip, and Jeanette is quite familiar with Indio and the surrounding area. She scouted out a lot of our activities for this trip, starting with the East Indio Hills Badlands hike.

This was a very cool trail – it was around 9km in length and took us 2-hours to complete. This hike is the epitome of hiking through the desert with various rock landscapes and we even walked through multiple slot canyons. The highest point on the trail also provided beautiful views of Indio. While I would throughly recommend this hike, make sure to bring enough water and to consider doing it earlier in the day, as there is almost no shade on this trail (with the exception of the slot canyons)!

Views from the east Indio Badlands trail

The second hike we managed to fit in during our trip was actually about 1-hour south of Indio in Anza-Borrego Desert State Park. The trail is called Calcite Mine Trail, and as the name suggests, the Trail is littered with calcite minerals. Jeanette and Mike both collect rocks, making for an exciting rock-hunting adventure ツ. Even Justin and I myself managed to find a couple cool pieces of calcite to bring home!

Calcite Mine

We also managed to find a slot canyon on this trail – this was the highlight for me, personally!

Slot Canyon along the Calcite Mine Trail

I should note that the Calcite Mine Trail is actually fully accessible for a 4×4 vehicle, but unfortunately for us, we had to walk the trail since our vehicle did not have enough clearance. Similar to the East Indio Hills Badlands, it is best to do this hike in the morning, as shade is minimal, and to bring plenty of water.

Following the Calcite Mine Trail, we decided to drive for 1-hour to Slab City to see Salvation Mountain, as we had read several good reviews online about this attraction. However, other than reading a few reviews, we definitely did not know where we were going, and it turns out that Slab City is actually, to quote from Wikipedia, an “off-the-grid alternative lifestyle community.” In other words, this area is very rundown, and populated by homelessness and drug addicts. Slab City actually used to be a training camp for the military, and people have now built their homes on the “slabs” that remain from the military buildings. We got out of our vehicle to observe the Salvation Mountain artwork (which is a giant Christian mural made from bricks, tires and windows) and painted vehicles in the area, but we got startled by a person sitting in one of the vehicles – safe to say, we did not spend too much time in Slab City.

Salvation Mountain

We decided to head back to Indio but wanted to make a stop at the Bombay Beach Ruins – another attraction on Google with great reviews. Little did we know, the community of Bombay Beach is actually considered a “living ghost town.” In order to get to the beach ruins, we had to drive by the community, which is made up of several streets of mobile homes, many of which have been clearly abandoned.

When we reached the beach, we noticed only one other vehicle, as well as a sign that said something along the lines of “The last vehicle to enter did not leave.” Needless to say, we were a bit spooked and decided to observe the ruins from our vehicle without getting out! Amongst the ruins was a lemonade stand, a giant fish, a decapitated person and a bus stop that read “ETA NEVER.” We decided this was another place we did not want to hang around at for too long ツ.

The bus stop at the Bombay Beach Ruins

After leaving the beach, we drove through the community to observe the homes. We later learned that there is a small population that continues to live in Bombay Beach, but as noted above, most of the homes are unoccupied. One of the homes even had a swing set with skeletons on it!

We definitely spent some time reading up about Bombay Beach after leaving, and apparently it used to be the “hip and happening place” in the 1950s. However, the Community is situated right next to the Salton Sea, which is becoming increasingly toxic, and ultimately resulted in many residents leaving the area. If you have some free time, I would definitely recommend reading up on both Slab City and Bombay Beach, California – it is all very interesting! But, I am not sure if I would recommend going for a visit ツ.

Lastly, because this was Mike’s first time in California, we took him on a tour through Joshua Tree National Park. Unfortunately, it was quite cold (6°C) when we went, and to make things worse, incredibly windy. It was so windy that Jeanette and I both ended up with wind burn on our faces! Either way, we made the most of our time there by doing a quick hike to the Arch and Heart rocks, pit-stopped for a quick visit to Skull Rock, and also stopped at the Hall of Horrors exhibit to see the Joshua Trees up close!

Arch Rock in Joshua Tree National Park
Just a couple of Joshua Trees ツ

I think that is it! Hopefully if you are planning a trip to Palm Springs in the future, this post (along with my other post) will give you some ideas on activities to check out in the surrounding area!

Always grateful,

Michelle

Local Hikes of 2023

I cannot believe it has been over 3 months since I last published a post! Things have definitely been busy on my end, but I assure you, the adventures have not stopped ツ. In the last few months of this year, we enjoyed trips to Revelstoke, Palm Springs and Leavenworth. While I intend to write separate posts for each of these trips in the New Year, I thought it would be fun to recap the hikes we did locally in 2023. Reminder that “local” for these purposes is defined as being within 2-hours from home!

Make sure to also check out my Local Hikes of 2022 post!

Varley Trail Loop, North Vancouver (Lynn Canyon Park) – January 2023

We had some surprisingly nice weather in early January and decided to take advantage of it by doing the Varley Loop Trail out in Lynn Canyon. I would consider this to be more of a walk than a hike, as the Trail has very little elevation gain, and takes around 1-hour to complete. This is a great option to consider if you are looking to get outside but want to do something less strenuous.

Dog Mountain Trail, Vancouver (Mt Seymour) – March 2023

While we have done the Dog Mountain Trail before, this was our first time completing it in the winter, which made for a completely different experience!

When we did this trail in the summer of 2022, we found it to be a bit technical, as there are many exposed tree roots to navigate – apparently this is from erosion due to the popularity of the trail. But, in the winter, the entire trail is covered in snow (obviously), which actually makes the trail easier, as you do not need to watch where you are going with every step. If there has been a recent snowfall, you will need snow shoes for Dog Mountain, but if the snow is quite packed, consider ice cleats or crampons, as well as hiking poles. One last thing to consider are the bugs – although we did not have any issues with bugs in the summer, apparently they can be very problematic. But in the winter, there are no bugs, leading me to think that winter is a better choice for this trail overall!

Regardless of when you choose to do the trail, you will still get to experience the same beautiful views of Vancouver at the end!

Views of Vancouver from the Dog Mountain Trail

Gold Creek Lookout, Maple Ridge (Golden Ears Provincial Park) – April 2023

There are so many different trails to choose from at Golden Ears Provincial Park that it can be difficult to pick which one to do! This year, we explored two different trails, starting with Gold Creek Lookout in April.

Overall, this was a very peaceful hike – we enjoyed the sounds of rushing water as we walked next to Gold Creek, and only encountered a couple of other people on the trail. The hike is around 8km and took us roughly 2-hours to complete. While I would not consider this to be a difficult hike (only 250m of elevation gain), there are a lot of rocks along the trail – make sure to watch your step! I learned this the hard way while stepping across a couple larger rocks, and one of them happened to be loose – down I went! Fortunately, I only ended up with a couple of small scratches ツ.

Views from the Gold Creek Lookout

Capilano River Regional Park (North Vancouver) – June 2023

Earlier this summer, we had the opportunity to explore the network of various trails within Capilano River Regional Park. I am not sure where exactly we ended up, as our friends who live in North Vancouver took us on a tour of their backyard – they knew how all the trails connected like the back of their hand! Most of the trails were fairly easy and provided for a very peaceful walk amongst the trees. While exploring the area you will walk along the Capilano River, you can see the Cleveland Dam, and you will also stumble upon Capilano Lake – definitely worth a visit!

Capilano Lake – one of the many sights we came across while exploring Capilano River Regional Park

McKee Peak, Abbotsford – June 2023

This was my first hike ever in the Abbotsford area. Overall, the hike was fairly short, but I would rate it as “moderate,” as it had a steady incline all the way to the end. We picked a rather warm day for this hike (it was around 25°C), but fortunately, the trees provided enough shade to keep everyone cool. While the views of the Fraser Valley were quite spectacular, the best part was the swing at the top!

Views of the Fraser Valley from McKee Peak
The best park of the McKee Peak trail – the swing!

After our hike, we enjoyed some food and drinks at Field House Brewing!

Mt. Gardner, Bowen Island – July 2023

Mt. Gardner it located on Bowen Island, which is accessible from North Vancouver via a short ferry ride. The Island itself is fairly small – you can drive from one side of the Island to the other in under 20-minutes. But despite being small in size, there are several trails to explore, as well as cute shops and beaches to visit! During our short visit (it was a day trip), we only had time for the hike, and to grab some food and drinks at the Bowen Island Pub before heading back to the mainland.

In trying to reconcile all the hikes we did this year, I am now unable to find the actual trail we did to get to the top of Mt. Gardner. I think it was called Mt. Gardner via North Summit, Handlogger, Skid Trail but this trail no longer exists on the AllTrails app – it now appears to be called Handloggers Trail – North Summit Trail – Skid Trail.

There are two main viewpoints along this trail, both of which offer views of another small island – Keats Island.

Sights of Keats Island from the first viewpoint along the trail we completed on Bowen Island

I would rate the route we chose to reach the top of Mt. Gardner as “hard.” According to my watch, the entire trail was around 11.5kms, and there were a lot of fallen trees to navigate, rocks, and areas with steep incline – there were even chains and ropes near to end to assist with the climb! But overall, I found this trail to be very peaceful, and our group had a lot of fun!

Mystery Lake & Mystery Peak Loop, Vancouver (Mt. Seymour) – August 2023

Mystery Lake & Mystery Peak Loop is a short but popular trail located on Mt. Seymour. The hike is fairly short – only 4.3km – and not too difficult. The hardest part is the climb to get to the top of Mystery Peak, but this can be easily skipped if you want to avoid any incline. Make sure to bring your bug spray if you are hiking this trail during the summer, and also your bathing suit to take a quick dip in the Lake!

Stawamus Chief First, Second and Third Peak Loop, Squamish – October 2023

Justin and I did the first two peaks of the Chief back in 2016, and for years we have been saying we need to go back and complete the last peak. Well, that time finally came in early October – we had such a beautiful start to the fall season that we were able to fit in a couple of more hikes from our Summer 2023 Bucket List this year… even though it was no longer technically summer ツ.

We had a pretty early start to our day, as we had planned to meet a couple of our friends in the parking lot near the start of the trail head at 7:30am. While the Chief is a very well-known hike, it is definitely one of the harder hikes we completed this year. However, because of its popularity, the Chief gets many tourists, some of which show up to attempt the hike in Converse and sandals – personally, I would not recommend this, even if you are only doing one of the three peaks! The route we completed to do all three peaks (which does not appear to match AllTrails) was around 8.5km with 850m of elevation gain, and it took around 4-hours. There are many stairs to climb, rocks and ladders – there are even chains along the hike to help you climb up steeper rock faces.

If you are looking for a challenge, definitely consider completing all three peaks. But, if you are a less experienced hiker who just wants to see the views, consider doing only the first or maybe a combination of the first and second peak – I think the second peak has the best views ツ.

Views of Squamish from the Second Peak of the Chief

Lower Gold Creek Falls Trail, Maple Ridge (Golden Ears Provincial Park) – October 2023

We finished up our local outdoor adventures this year by doing another hike at Golden Ears Provincial Park. We had a truly beautiful October in the Vancouver area, and while it got a bit colder than usual for this time of year, we were just happy to see sunshine and avoid the rain!

The Lower Gold Creek Falls Trail is a very popular trail within this park, and just like the Gold Creek Lookout, we were able to enjoy the peacefulness this hike has to offer as it was not very busy the day we were there. It took us around 1.5-hours to complete the hike, as we took our time along the trail – taking lots of photos and taking in the beauty of the area.

A beach along Gold Creek on the way to the Lower Falls

Well, I think that covers all the local trails we explored this year! Let me know if you decide to try any of these and how you enjoy them! And on that note, I am hoping everyone had a great holiday season, and wishing you many safe and incredible adventures for 2024!

Always grateful,

Michelle

Glacier National Park

I thought it would be appropriate to start this blog post with a riddle: What do you get when you cross a long weekend with an Annual National Park Pass? A trip to Glacier National Park! That was a good one, right ツ?

Justin and I used the Labour Day long weekend as an opportunity to visit Glacier National Park (GNP) in Montana, US. We have now been to 8 National Parks, but we both agree that this one is our favourite thus far – if you do not have this beautiful park on your travel bucket list, make sure to add it!

Instead of directly driving to GNP (which would take around 12-hours, not including any stops), we opted to fly to Calgary and drive across the border through Alberta. In the end, when you consider the time we spent at the airport, waiting for our luggage and in the rental car line-up, it still took us almost 12-hours to get to Montana, but we were able to reduce our actual driving time to 5-hours.

I should note, though, that our decision to fly and rent a car did require some additional planning. For instance, we had to find a car rental company that would allow us to cross the border (we went with Avis), and we had to research the border crossing options between Alberta and Montana, and further, their hours of operation. Well, our plan was to enter Montana through the Piegan Port of Entry, and according to the internet, it was open until 11pm. However, at 7:05pm when we were about 5-minutes away from the border crossing, we passed a sign that said the border was open from 8am to 6pm. Our heart’s sank – we did not think we were going to make it tonight. We decided to keep driving to confirm the border was indeed closed, and to our surprise, it was open! We asked the border guard about the sign we saw, and he laughed and said to never trust the signage – to anyone reading this, make sure to call the Port of Entry to confirm its hours and to avoid giving yourself a panic attack!

After getting through the border, it was another 2.5-hours to our Airbnb in Columbia Falls, and one of the ways to get there was to actually drive through GNP. We entered the park through the East Entrance, and this ended up being our only opportunity to see this side of the Park, as it takes well over 2-hours to drive across GNP. We felt grateful to be driving through in the evening, as we were able to catch the sun setting over St. Mary Lake.

Sun setting over St. Mary Lake near the East Entrance of GNP

Glacier National Park – Day 1

Because this was a quick weekend trip, we only had 2 full days to spend at GNP, and I will say this was no where near enough time – we only scratched the surface of what this amazing Park has to offer.

Similar to our experience at Arches National Park in Utah, visitors need to obtain a Vehicle Reservation in order to access GNP during certain times of the year. There are four main areas of the Park, and each requires its own reservation: North Fork, Two Medicine, Many Glacier and Going-to-the-Sun. Because our trip was rather short, we only ended up getting a pass for Going-to-the-Sun, as this is the main/biggest part of GNP. The reservation for Going-to-the-Sun is $2USD and is valid for 3-consecutive days – in other words, we obtained a pass starting on September 1st, and we could also use it to enter the park on September 2nd and 3rd.

All the research we did leading up to our trip said the same thing: parking within GNP is very limited – arrive early! For this reason, we planned to be at the trailhead of the first hike we wanted to complete, Avalanche Lake, before 8am. We lucked out and got the last parking spot by the start of the trailhead (but there were other parking lots near by with spaces still available).

The Avalanche Lake hike is a 10km out-and-back trail to a beautiful lake nestled between the mountains. The hike is not particularly challenging, and because of its rewarding views, it is very busy and popular amongst visitors. My biggest recommendation would be to ensure you actually go to the end of the trail (there will be a sign identifying the end) and turning left towards the lake. You have to walk through some bushes, but this small sandy beach provides the best views of the lake. I would assume, based on the size of the crowds, that many people stop at the start of the lake and do not continue until the end.

Views of Avalanche Lake at the end of the trail
The sun peaking over the mountains at the start of Avalanche Lake

In terms of wildlife on the trail, we only encountered some birds, along with some very hungry chipmunks who were curious about everyone’s snacks!

After completing the Avalanche Lake trail, we got back to our vehicle and started driving towards the summit – Logan Pass (6646 ft elevation). The trailhead of the hike we wanted to do next, Hidden Lake, was accessible from the parking lot at Logan Pass. However, we read several reviews advising to arrive at Logan Pass early, and the reviews were not wrong – when we pulled up at 12:30pm, it was insanely busy!

The Logan Pass parking lot is small, and for this reason, you will find many people walking around (even by the Visitor’s Centre entrance doors) talking to others, trying to figure out who is leaving and where they are parked. We got very lucky with finding parking – a family flagged us down as we were driving around and said to follow them. We noticed their license plates were from Alberta, which is where our rental vehicle was from – Albertan folks just looking out for each other ツ.

After checking out the Visitor Centre, and picking up our GNP swag, we started on the Hidden Lake Trail. While the hike towards the lookout only had a bit of an incline, I found myself experiencing shortness of breath – I believe the higher elevation made it a bit difficult for me to breathe. However, it only took about 30-minutes to arrive at the overlook, which was probably one of my favourite views from the entire trip.

Hidden Lake Overlook

After you reach the overlook you have the option to go back, or you can hike down to lake-level. Of course, we decided to keep going! The hike down involves a series of switchbacks, and you likely know by now that I am a big proponent for hiking poles – they were incredibly helpful during this hike. While downhill hiking might be easier on your lungs, it requires a lot of physical strength, as your muscles lengthen and your body needs to actively prevent itself from tumbling forward!

What I enjoyed most about the hike down was watching the views of the lake change as we got closer, and also making a new little friend along the way ツ.

Our new chipmunk friend enjoying the views, but mostly looking for snacks (do not feed the wild life!)

Once we got to the lake, we spent some time enjoying the views and Justin also dipped his feet in the water. He had considered going for a swim, but the water was incredibly cold!

The view of Hidden Lake at lake-level

After a short break, it was time to walk up the switch backs – what goes down must come up… that is how the saying goes, right? Anyway, I was quickly reminded about the shortness of breath I experienced earlier on the trail, and even made a bad joke to a couple of happy hikers who we passed (they were heading towards the lake) that they will eventually need to head back up, too! By the time we made it back to our vehicle, we had hiked over 18km that day – it was time to head back to Columbia Falls to eat and rest in preparation for another long day!

Glacier National Park – Day 2

For our second, and final, day at GNP, we made our way back to Logan Pass, as the trailhead for the Highline Trail is across the street from this parking lot. We had two different options for doing this trail. The first option was to do the out-and-back: walk 12km from Logan Pass to the ending point of the trail (which is actually the Granite Park Chalet and cabins in the mountains) and back, for a total of 24km. The second option was to walk 12km from Logan Pass to the Chalet, then 6km down the mountain to to a bus stop, and take the shuttle back to the Logan Pass parking lot. The Park Ranger who went through our options with us even suggested hitchhiking back to our vehicle!

Given that I was feeling pretty “broken” from the 18km we did the day before, we discussed just doing a little bit of the trail and then reassessing our options. Well, a little bit ended up turning into a lot, as we ended up completing option 2! The AllTrails app rates the Highline Trail as hard, although I would personally classify it as easy or moderate. While the trail does involve some elevation gain, it is very gradual, as it is spread out over several kilometres. If you take your time and bring hiking poles, it is very manageable! The hardest part was the 6km down from the Chalet – if you struggle with downhill, it might be best to do the full 24km!

All the reviews we read indicated sights of wildlife along the Highline Trail – I was really hoping to see a mountain goat or a moose (from a safe distance, of course), but it was not our lucky day. However, we did see a couple does and one very big buck, and way off in the distance we could see three white dots (mountain goats) moving on one of the mountains – note to self to bring binoculars on the next trip!

This doe stepped right out of a bush onto the trail in front of me!

While we did not see the wildlife we had hoped for, the views were spectacular – I felt like I was looking at a postcard during the entire hike. A majority of the trail is situated along the side of the mountains, and for the first part, you can actually see the road and cars below you – it was a bit scary, but very cool at the same time!

Views of GNP along the Highline Trail – can you see the road?
Justin hiking along Highline Trail with views of the Chalet in the distance

We actually ended up making friends with a couple from North Carolina during the hike – Austin and Sarah. We hiked part of the way to the Chalet with them, and then down the mountain. We later learned that Austin and Sarah got engaged the night before – congratulations to them!

Once we reached the shuttle stop at the bottom of the mountain (which is on the Going-to-the-Sun road), we realized there were several groups of people waiting for the shuttle, and the shuttles are not very big. To our surprise, we decided to follow the Park Ranger’s advice and hitchhike back to our vehicle at Logan Pass! Apparently our trip to GNP included two types of hiking ツ.

But I will say, if there is anywhere to take a chance on hitchhiking, it is in GNP. The park is very busy and filled with tourists – all we had to do was ask someone who was parked on the side of the road taking photos if they were heading in the direction of Logan Pass, and if they would willing to give us a ride to our vehicle!

One more view from the Highline Trail, as we were getting closer to the Chalet

The one problem with quick trips is you never get the chance to complete everything on the list. GNP is located near Whitefish, Montana, which is a well-known ski town. We were hoping to do a bit of exploring in Whitefish, and also Columbia Falls, but we just did not have enough time. We did, however, get the chance to check out the local Brewery in Columbia Falls (Backslope Brewing), as well as the Bulldog Saloon in Whitefish. Hopefully we can spend more time exploring the local shops during our next trip!

Before I wrap up this post, I want to give a shoutout to our Airbnb in Columbia Falls. We loved our cute loft accommodation and would definitely recommend staying here to anyone who plans to visit GNP in the future.

And finally, unrelated to GNP, I want to celebrate that the Exploring With Gratitude blog has now been around for 1 full year! Thanks to everyone who has been reading my posts over the last year, and an extra special thank you to all my subscribers ツ!

Always grateful,

Michelle

Joffre Lakes & Whistler Reminiscing

Back in June, Justin and I made a Summer 2023 Bucket List, and one of the items on the list was to do the Joffre Lakes hike outside of Pemberton. Well, I am happy to report that on July 16th, we crossed Joffre Lakes off the list!

Because the hike is around a 3-hour drive from where we live (one way), we thought it would be the perfect opportunity to also spend a night in Whistler.

Before I get into discussing the actual hike, I should note that visitors are required to reserve a Day Pass in order to visit Joffre Lakes – this is a fairly new system (introduced during COVID-19) to help with crowd management. Passes are released 2 days in advance at 7am – this means that if we wanted to do the hike on July 16th, we would be able to reserve the pass starting on July 14th. According to the park rangers (who we spoke to at the Joffre Lakes entrance), between 100 and 200 people show up to do the hike everyday without a pass! Consider yourself warned ツ.

Anyway, due to the booking system, we decided to do a “practice” attempt to ensure we knew all the steps we would need to go through to receive a pass. We did the practice attempt on Thursday to try and receive a pass for Saturday, and to our surprise, all passes were reserved by 7:01am! This made us a bit nervous, as the hike is clearly very busy and popular on weekends.

For this reason, we recruited a couple of friends who were available on Friday morning at 7:00am to help us with securing a pass. We had the webpage loaded, our emails copied and ready to paste, and the world clock counting us down. Fortunately, we were successful in reserving multiple passes – we ended up cancelling all the ones we did not need for anyone else attempting to make a reservation ツ.

We left our place at 7:00am on Sunday morning, with the intention of arriving at the Joffre Lakes parking lot by 10am. We were a bit worried that the lot might be full by this time; however, while the parking lot closest to the entrance was mostly full (a couple spots remaining), the overflow parking was basically empty and we had no trouble finding a spot to park. And, the walk to the start of the trail from the overflow parking is only a couple of minutes long.

Right before the start of the trail head, there is a tent setup with multiple park rangers who ask to verify your pass before allowing you to proceed to the trail. We read several reviews of visitors being turned away without a pass, and having to drive 10-minutes back down the road where there is cell service to try and see if any more passes are available for the day. But, we had our pass ready to go, and after having it scanned, we were off!

If you are not familiar with the Joffre Lakes hike, it is a difficult (as per AllTrails) out-and-back trail, and visitors can expect the hike to take anywhere from 4 to 6 hours. Joffre Lakes is comprised of 3 lakes (lower, middle and upper lakes), and after only a couple of minutes on the trail, you will be greeted by the turquoise blue waters of the lower lake, surrounded by picturesque mountains. Believe it or not, these stunning views are only a “sneak peek” of what is to come!

Views of the Lower Lake at Joffre Lakes

The real work begins after the first lake – your next 3.7km will be a steady incline (aka nature’s stair master) all the way to the middle lake. If you struggle with going uphill, my recommendation would be to take your time and enjoy your surroundings – the views are definitely worth it.

Nature’s Stair Master

You will likely spend quite a bit of time at the middle lake. This is where you can get in line for the infamous log photo (search #joffrelakes on Instagram) and you will see many visitors swimming in the glacier waters. On our way back, Justin actually went for a quick dip in the middle lake and swam out to the tip of the log. While he claimed it was refreshing, he also said it was very cold!

The turquoise blue waters of the Middle Lake

After you have enjoyed the middle lake, continue walking for another 20-minutes and you will reach the upper lake. Many visitors will stop here to enjoy their lunch while taking in the views. But, be careful not to make your lunch too obvious – a bird literally flew into me and tried to steal my sandwich! I will neither confirm nor deny this, but there might have been some screaming on my part.

At this point, you are probably thinking you have “seen it all” and it is time to head back, but you can actually keep hiking for another kilometre towards the Upper Lakes Campground. While many visitors opt for a day hike, you can also make overnight reservations at Joffre Lakes. I would definitely encourage you to keep going towards the campground (even if you are not camping), as it provides another perspective of the upper lake that you will not get from the main viewing area.

Views of the Upper Lake from the Campground

After taking in the views at the upper lake from multiple angles, it was finally time to start making our way out of Joffre Lakes. While the hike down is not that steep, it does extend for a few kilometres – if you struggle with going down hill, I would definitely recommend bringing hiking poles (something I did not bring with me). One other recommendation I will make, which should seem pretty obvious, is to wear proper clothing and footwear. I was amazed at how many visitors I saw in denim shorts, converse and sandals – I even saw a woman wearing flip-flops, and she was carrying a baby!

The views you will be surrounded by while hiking between the Lower and Middle Lakes

In the end, we spent around 4-hours completing this hike – 3-hours of hiking and a little over an hour for photo opportunities and lunch. We thoroughly enjoyed our experience at Joffre Lakes!

One thing I was really looking forward to following our hike was stopping at The Hwy Cafe in Pemberton for lunch. This plant-based food establishment serves the best Buffalo Chick’n Wrap. Not only is it absolutely delicious, but the portion size is huge!

Whistler

Following our Joffre Lakes hike, and very satisfying wraps, we made our way to Whistler Village. Because we have been making annual visits to Whistler for four years now, I am reminiscing on all the different activities we have done over the years and the restaurants we have tried:

Activities:

  • Hike to the Whistler Train Wreck: As the name suggests, the Whistler Train Wreck is a short hike that includes views of the Cheakamus River and the remains of a derailed freight train from 1956. There are a couple different ways to access the Train Wreck – we opted to park in a pull-off on the Sea to Sky Highway and walk for around 1km. The box cars are covered in colourful graffiti (which make for a fun photo opportunity) and you will also be able to cross a small suspension bridge that extends across the Cheakamus River.
One of the box cars at the Whistler Train Wreck
  • Hike at Rainbow Falls Loop: This is a relatively easy and short hike (2km), and it provides some nice views of the mountains in addition to the Rainbow Waterfall.
  • Walk or bike around the Whistler Valley Trail: The Whistler Valley Trail is the perfect way to see all of Whistler – it will connect you to various different lakes such as Lost Lake and Alta Lake, and take you through different Whistler neighbourhoods like Blueberry and Creekside. On multiple occasions, we have taken our bikes with us to Whistler and enjoyed biking along the Valley Trail for several hours. If you find yourself on the trail near Lost Lake in July or August, please be careful of the Tiny Toads migrating from the lake to the forest!
  • Hike the Brandywine Meadows: This trail (which is different from Brandywine Falls) is a stunning 11km hike through the valley/meadow, which is surrounded by wild flowers, streams and mountains. You will need a heavy duty vehicle (4×4) to get to the start of the trail, but be prepared for a very bumpy and rocky ride! Also, bring bug spray – the black flies are out of control.
The valley at Brandywine Meadows – it was quite smokey while we were there!
  • Ice Skate in the Village (Winter only, obviously ツ): Back in January 2022, we set out on a mission to find an ODR (outdoor rink), with our sights set on Green Lake. However, there was so much fresh snow in Whistler at the time that all the lakes were covered by several feet of snow, even though they were frozen underneath! As a result, we had to settle for the ice rink in the Village, which was still a fun experience – the music provided for a great atmosphere, and with the snow continuing to fall, it felt like we were skating in a winter wonderland.
  • Relax at the Scandinave Spa: Last year for my birthday, Justin surprised me by taking me to Whistler for a day of relaxation. We spent hours in the hot and cold baths, saunas, sleeping in hammocks and even enjoyed a much needed deep tissue massage. If you enjoy Nordic-style spas, you must put this on your to-do list!

Food:

  • Earls Kitchen + Bar: While this restaurant is not a local Whistler find, I find myself gravitating to Earls Kitchen + Bar every time we are Whistler. It has a great plant-based menu and a great atmosphere. This is where we had dinner during our last visit – I was surprised we were even hungry after our wraps from The Hwy Cafe!
  • Pure Bread: Similarly to Earls, even though there are a couple Pure Bread locations in Vancouver, we only find ourselves enjoying Pure Bread while in Whistler, as the Vancouver locations are not easily accessible for Justin and I. Pure Bread has the most amazing display of pastries and bread, several plant-based options, and they also offer hand-crafted coffee beverages.
  • Moguls Coffee House: Moguls is our go-to breakfast spot in Whistler. Their overnight oats and vegan breakfast burrito are both delicious! They also serve a variety of plant-based pastries and their coffee is also very good.
  • 21 Steps: After our Scandinave experience last year, Justin took me for a birthday dinner to 21 Steps. And yes, there are actually 21 stairs you need to climb to reach the hostess stand! But, you have to climb more stairs to get to their second level. They used to have a cashew-based pasta on their menu, but it looks to have been replaced by a roasted tomato and garlic option – I look forward to trying this during our next visit!
  • Naked Sprout Cafe: This is another great breakfast and lunch spot – Naked Cafe offers several different sandwich and smoothie options, many of which are plant-based.
  • La Cantina Tacos: Another favourite go-to while in Whistler. La Cantina offers plant-based taco options, fresh chips and guac, and delicious margaritas!

I hope this blog helps you in planning your future Joffre Lakes hike, as well as provides some ideas on what to do when you visit Whistler!

Always grateful,

Michelle

Long Weekend in West Kelowna

I cannot believe it has been 6 weeks since my last blog post – time flies! While I work on documenting the details of our trip to Europe from May and June, I thought I would quickly update you on our trip to West Kelowna during the Canada Day long weekend.

A couple weekends ago, Justin and I (and the dogs) had the opportunity to visit our old neighbour’s who moved to West Kelowna last year. Fortunately for us, our neighbour’s home has a beautiful guest suite that we were able to stay in during our visit, that is in very close proximity to Rose Valley Regional Park.

While Justin and I are typically always “on the go” when we are away, this weekend getaway was the perfect combination of exploration and relaxation. We very much enjoyed visiting with our neighbours and also getting the chance to explore West Kelowna!

Outdoor Activities:

We started our first morning in West Kelowna by doing the Rooster Tree Lake Loop hike. This is a beautiful trail in Rose Valley Regional Park, providing views of both Rose Valley Lake on one side, and then Kelowna and Okanagan Lake on the other. Because this is a loop trail, you can choose your starting direction. We went counter clockwise, as some reviews we read indicated it would be a “better workout” this way, as it involves more uphill climbs. While this was true, and we had some hills to overcome, I believe this was ultimately the safer option as I often find it difficult to go down hill, especially if there is loose gravel and I do not have my hiking poles. We very much enjoyed this hike, which took us approximately 1.5-hours; however, we took our time taking pictures and taking in the views. Our one dog, Bruno, especially enjoyed himself, as he accidentally ended up doing a belly flop into Rose Valley Lake while chasing a bird!

Rose Valley Lake – where Bruno went for his “unplanned” swim!
Important words of encouragement along the Rooster Tree Lake Loop ツ

The other hike we did in the area was the Boucherie Rush Trail. This trail is a series of switchbacks up Mount Boucherie, which provides stunning views of West Kelowna, Okanagan Lake and the wineries in the area (more on this below) once you reach the top. We started this trail at 9am, and it is a good thing we did, as there is no shade on this trail – it is definitely not a hike you want to be doing in the heat of the day. Overall, we enjoyed this hike and would recommend it to others. A fun fact for you – Mount Boucherie is actually a dormant volcano!

Views from the top of the Boucherie Rush Trail

While not a hike, we also decided to check out Gellatly Dog Beach, as we thought it would be fun to give the dogs a chance to cool off. It was a successful visit as Bruno did some swimming, Bella dipped her paws in the lake, and both dogs enjoyed chasing each other in the sand!

Finally, our neighbours offered to take us on a boat ride on Okanagan Lake during our final morning in West Kelowna. While I screamed a little bit when the boat went fast, I thoroughly enjoyed being out on the lake ツ.

Views of downtown Kelowna from the boat

Wineries:

For those who may not be familiar with the area, British Columbia’s Okanagan region is very well known for its wine. According to WineBC, there are over 200 licensed wineries in the area.

Fortunately for us, West Kelowna is home to several of these wineries and we chose to visit two: Frind Estate Beach Winery and Quail’s Gate Estate Winery. Our decision making process ultimately came down to both of these wineries being dog friendly (thank you!) ツ. I should also note that we booked reservations in advance, as we anticipated it would be busy during the long weekend!

Our first tasting was at Frind Estate Beach Winery. Since we had our dogs with us, we did our tasting outside while enjoying views of Okanagan Lake. Apparently this winery is the only beach front winery in all of North America (apparently I am full of the fun facts in this blog post)!

Our tasting consisted of four wines: a Chardonnay, Viognier, Rose and Merlot. While we enjoyed all the wines, we ended up purchasing a bottle of the Viognier to bring home, and we appreciated that the cost of the wine tasting could be used as a credit towards our purchase – apparently this is no longer standard practice at all wineries!

Following the tasting, we were able to order a single glass of wine (amongst other drink options) to enjoy at the property’s picnic tables from Annie’s Beach Cafe. The Cafe offers other drink options such as sangrias and non-alcoholic beverages, as well as food. We had intended on trying one of the pizza options (with plant-based cheese), but we were short on time as we had to make it to our next reservation at Quail’s Gate.

Quail’s Gate is one of the more popular and better well known wineries in West Kelowna. We opted for the Estate/Collector Tasting and, again, we were able to enjoy the tasting outside with the dogs. Bella and Bruno reached celebrity status while we were at Quail’s Gate – an employee asked to take a photo of them, and a guest asked for photos with them!

Walking between the vineyards at Quail’s Gate Estate Winery
Quail’s Gate Vineyards & Okanagan Lake

While not a beach front property, Quail’s Gate does have vineyards on its property, as well as views of the Lake. However, what made the wine tasting a particularly mind blowing experience was the unprecedented wind storm we experienced – see what I did there? We had to put menus on the bases of our wine glasses to keep them in place, and I gave up on my hat after it blew off my head for the third time ツ.

Food Establishments:

And finally, here is a list of food and drink establishments we checked out in West Kelowna and Kelowna. Again, our decisions on where to eat during this trip really came down to whether the establishments had dog friendly patios!

  • Naked Cafe: This was our second time at Naked Cafe, an all plant-based food establishment, which is actually in Kelowna (not West Kelowna). Our first visit was last year when we drove through Kelowna during our BC Road Trip in May 2022. I ordered the Sweet Chili Seitan Bowl, while Justin tried the Pad Thai. We then treated ourselves to a slice of carrot cake for dessert – everything was delicious!
  • Lakesider Brewing: This brewery had several great plant-based options that we were excited to try – the Warm Pretzel, Loaded (Tater) Tots and Margherita Pizza. We managed to order everything during the happy hour, which was an added bonus. In terms of drinks, Justin had a flight (with our favourite being the Blueberry Vanilla Nitro Sour) and I tried the Endless Summer Patio Heff, and was able to add peach slushy to it – so refreshing!
  • Central Kitchen + Bar: Like Naked Cafe, Central Kitchen + Bar is located in downtown Kelowna. Justin and I shared (if you know us, you will know this is a rare occurrence) The Herbivore burger and Central’s Pad Thai. While we enjoyed our dinner and the service was great, we went to Central Kitchen + Bar the same day we visited the wineries – the wind definitely made it difficult to enjoy our meal, and my menu even went flying 50 feet in the air at one point!
  • Parlour Ice Cream: We were very excited that Parlour Ice Cream offered plant-based ice cream options. They had two flavours available during our visit – Sea Salt Caramel and Mud Pie, and while both were good, the Mud Pie was a clear winner for us.

Well – I think that covers everything we got up to in West Kelowna a couple weekends ago! We are off to Pemberton and Whistler tomorrow – I will be sure to provide an update on this visit very soon ツ.

Always grateful,

Michelle

Arches, Canyonlands & Monument Valley (Utah Road Trip – Part 3 of 3)

The last part of our road trip through Utah consisted of visiting Arches National Park, Canyonlands National Park and Monument Valley (which is actually in Arizona). I will start with Arches!

Arches National Park

In my last post, I mentioned that our next Airbnb, after leaving Bryce Canyon, was in Monticello. Monticello is a small town about an hour outside of Moab (Arches is right in Moab), and we decided to stay here because it was the most cost effective. We discovered once we arrived in the area that the reason accommodation was so expensive in Moab during our visit was due to the annual week-long Moab Jeep Festival that was taking place – there were definitely a lot of Jeeps around!

While staying in Monticello provided some cost savings, the additional driving time definitely made for some long days. But that is enough about our accommodation.

One feature that is different about Arches compared to the other parks is a timed entry ticket. At 6pm the day before you intend to visit Arches, you are required to reserve your entry time into the park. I believe that Arches also releases tickets at the start of the calendar year, but we had not planned our trip that far in advance and had to get our timed entry ticket the night before.

Anyway, as Iwona was selecting our preferred start time (which was 10am to 11am), she learned that she had to be signed into her account in order to reserve a time. However, Iwona did not have an account and had to create one on the spot, and by the time she finished, the 10am to 11am entry was gone – the Arches visitors mean business! So, if you are reading this and heading to Arches in the future, make sure to have your account created and ready to go (you are welcome)!

Fortunately, we managed to reserve the 9am to 10am entry time, and arrived at Arches the next day with little time to spare – 9:55am to be exact.

Our first stop within the park was to see the Delicate Arch. This was an incredibly busy trail, as the Delicate Arch is stated to be the most famous natural arch worldwide – it is even on the Utah license plate! The trail is approximately 5km long, and includes a couple other viewing points. You will initially pass the Wolfe Ranch, an old wooden cabin from the late 1800s, and also petroglyphs of what appear to be horses and/or big-horned sheep.

Petroglyphs on the way to Delicate Arch

While the hike towards the Delicate Arch was not the most scenic (relatively speaking, compared to other hikes during our trip), the Arch itself was magnificent. Most of the other arches we saw within the park are supported by rock formations on either side of it, but the Delicate Arch is “free standing” (sophisticated geological description ツ). It is not surprising that this is the top-rated view in the Park!

The iconic Delicate Arch

The second hike we did within Arches National Park was the Devil’s Garden Trail. There are multiple different ways you can complete this trail (“choose your own adventure,” they call it), and the arches you will be able to see will depend on the route you take. We decided to go out-and-back to the Double O Arch, which allowed us to also see the Landscape Arch on our way.

Landscape Arch – longest arch on the continent!

The walk to Landscape Arch only took about 15 minutes, but it took at least another 40-minutes to reach the Double O Arch. Once you pass the Landscape Arch, you have to climb up a rock scramble in order to continue along the trail, and there is also one stretch where the pathway is just a long narrow rock. These elements made for an exciting hike – it was a lot different from the others on our trip. But, the trail itself has absolutely no shade – you definitely do not want to be out here in the middle of a hot day.

Double O Arch – a rewarding view after the rock scramble
Made a new friend along the way to the Double O Arch ツ

I know it might not sound like a lot, but between these two trails (Delicate Arch and Devil’s Garden), we had walked almost 12kms, and we were ready for a break! We finished our visit in Arches by driving by another one of its iconic landmarks, Balanced Rock (unfortunately, I did not get any good photos), then went to 98 Center Moab (a plant-based Vietnamese restaurant) for a very late lunch – the banh mi sandwiches we ordered were delicious.

While I am on the topic of food, my favourite food establishment for the entire trip was Proper Brewing in Moab. I ordered the Da Vinci Vegan Burger (it was incredibly messy but very flavourful) and Watermelon-Strawberry Kolsch beer. But, the real star at Proper Brewing was their oat-based soft serve ice cream and shakes – I would go back to Moab just for another one of these! We tried vanilla and Oreo, and the goal was to make it last as long as possible because it was so creamy and delicious!

I also need to give a shoutout to Singha Thai Cuisine – I really liked their Tofu Pad Thai dish, and the service was quick, which was really helpful when we were in a rush.

Lastly, the town of Moab itself is very cute – there are several small shops you can visit, many of which sell locally made art, jewelry, stickers, fudge and other items. They are definitely worth a visit, even just to browse.

Well – I think that covers everything I wanted to say about Arches and Moab – moving onto Canyonlands now!

Canyonlands National Park

I will start by stating that Canyonlands Park is huge – it is the biggest of the five national parks in Utah. There are two entrances to Canyonlands (North and South), and the park itself is split into four sections: Island in the Sky, The Needles, The Maze and The Rivers. We split-up our visit over two days, starting with a drive through Island in the Sky (from the North entrance) on the first day.

It takes about one hour to drive into the Park, after turning off the main highway in Moab. It was getting quite late in the day at this point, as we had spent the majority of our day at Arches, and we were looking for a spot to watch the sunset. We started by heading to the Grand View Point Overlook, which provided spectacular views into the canyons we were surrounded by – apparently the Colorado River runs through Canyonlands, but cannot be seen from the Viewpoint. As per the information board: “The river is cut so deeply into the landscape that it is not visible from here.”

Views from the Grand View Point Overlook

After taking in the views, we made our way over to the Mesa Arch. The Arch is located a very short walk from the parking lot, and overlooks another canyon (I guess this is why they call it Canyonlands ツ). While this probably would have been a better spot for a sun rise, we were still happy to experience the golden light setting on the canyon.

Sun setting through the Mesa Arch

For our second visit to Canyonlands, we entered through the South to head towards The Needles. Similar to the North entrance, it takes about an hour to reach the Visitor Centre. We started our visit with a quick stop at Newspaper Rock to see the petroglyphs. It was interesting to learn that archaeologists do not actually know what the petroglyphs mean – they could be telling a story, or possibly even graffiti. What do you think they mean?

The information board at Newspaper Rock
The markings (that are open to interpretation) at Newspaper Rock

We then proceeded to do a hike for sunset at Slickrock. As the name suggests, this trail consisted of walking along a smooth rock surface for almost 5kms. In order to complete the trail, you need to follow all the inukshuks – otherwise, it is very easy to get lost!

Views of the surrounding canyons and landscapes can be observed from four main viewpoints along the trail, and as we hoped, we were able to experience a beautiful sunset with golden light reflecting off the rock formations. While I was a little bit worried about what kind of wildlife we might run into (it was a very quiet trail), it ended up being my favourite hike during our trip!

Inukshuks leading the way along the Slickrock Trail
Views along the Slickrock Trail

Monument Valley, Arizona

While a visit to Monument Valley was not in our original itinerary, we saw several “signs” prior and during our trip that indicated we had to make time to visit this iconic Park. The first sign was a picture of Monument Valley on a Microsoft screensaver that came up on my work computer prior to our trip, and the other was a picture of the Park on a motorhome that we encountered while we were in Capitol Reef. These were clearly signs, right?

Anyway, while staying in Monticello proved to be somewhat inconvenient for visiting Arches and Canyonlands, it actually provided us with easier access to Monument Valley, as it was only 1.5-hours away, whereas if we stayed in Moab, we would have been 2.5-hours away.

As you approach Monument Valley, you drive down a stretch of highway (163) that is apparently a famous scene from the movie Forrest Gump. I am embarrassed to say that I have not seen this classic; however, I know there is a point in the movie where Forrest (Tom Hanks) has been running for over three years and decides he is tired and ready to go home, and the landscape behind Forrest at this point is Monument Valley.

Monument Valley itself is experienced by driving in a loop that is surrounded by several rock formations that are all in different stages of erosion. The entire drive takes about 1.5-hours and I would definitely recommend doing it in your own vehicle with the windows rolled-up if that is an option, rather than as part of a jeep tour, as the road is incredibly dusty! But either way, it is a specular drive and it is hard for me to fully understand how these massive sculptures exist amongst the rest of the desert landscape!

East & West Mitten Buttes and Merrick Butte in Monument Valley

Trip Recap

Well, I think that covers everything about our trip through Utah in April 2023. I thought I would finish off this three-part blog series with a recap of a couple of our favourite experiences from the trip ツ:

TopicCraigIwonaJustinMichelle
Favourite hikeScout’s Lookout (Zion)Scout’s Lookout (Zion)Devil’s Garden (Arches)Devil’s Garden (Arches)
Best viewsDelicate Arch (Arches)Emerald Pools (Zion)Emerald Pools (Zion)Slick Rock (Canyonlands)
Favourite overall momentTop of Scout’s Lookout (Zion)Walking through the hoodoos (Bryce Canyon)Vegas Knights hockey gameWalking through the hoodoos (Bryce Canyon)
Best road trip snackHaribo watermelon gummiesTrader Joe’s oat-based ice cream sandwichesHaribo gummy bearsTrader Joe’s corn chips (I was devastated when I accidentally spilled the entire bag onto the car floor)
Best road trip songIris – Goo Goo DollsCountry Roads – John DenverNothing Else Matters – MetallicaGo Your Own Way – Fleetwood Mac

Always grateful,

Michelle

Bryce Canyon & Capitol Reef National Parks (Utah Road Trip – Part 2 of 3)

In my last post, I thought I was going to be able to cover Las Vegas, and two National Parks (Zion and Bryce Canyon), but I overpromised. This time, I will just see where my writing takes me, starting with my take on Bryce Canyon ツ.

Bryce Canyon National Park

The drive from Zion to Bryce Canyon is about 2.5-hours long, and we actually managed to stay on track with this timeline, unlike our drive from Las Vegas to Zion. The trick was not to make too many stops between the two destinations (super obvious, I know) – we managed to restrain ourselves and only made one stop at Red Canyon.

Our stop at Red Canyon was very short – it was mostly an opportunity for us to get acquainted with the “hoodoos,” which we would see in abundance once we arrived in Bryce Canyon.

The hoodoos at Red Canyon

We arrived at our accommodation, which was actually in a small town called Tropic, by late afternoon. Because we were only in the area for one night, we were not particularly picky about where we stayed. However, we were very pleased with our accommodation at Bryce Country Cabins – these log cabins made for an authentic small-town experience, and they were very spacious and clean.

After getting settled, we made our way into the Park to have dinner at Bryce Canyon Lodge before heading to Sunset Point for – you guessed it – the sunset that evening.

Our first evening at Bryce Canyon was incredibly cold, it was around -10°C, and there was also a wind chill. I took a couple pictures of the sun setting on the hoodoos and then quickly made my way back to the vehicle to warm up my hands – my fingers felt like icicles! What made the situation worse was that the next day was going to be even colder – the Weather Network indicated it would be -25°C. For someone who does not tolerate cold very well, I was definitely a bit worried about staying warm during our hike the next morning, so our group started searching for somewhere to buy hand warmers, scarves etc. While the general store in the Park did not have scarves and was sold out of hand warmers (apparently we were not the only ones with this idea), we struck “gold” at a gas station in Tropic near our accommodation. I should have gone back to Bryce Canyon and sold my hand warmers for twice the price!

Sunset Point at Bryce Canyon

The next morning, we packed our stuff and I bundled-up in as many layers as I could in preparation for what was expected to be a very cold hike. This actually made packing easier, as I appeared to be wearing most of the clothes I brought! I attempted to wear three pairs of pants… but I could barely move… and opted for two pairs instead.

Our initial plan was to do the Navajo Loop and Queens Garden Trail; however, the Navajo Loop portion was closed during out visit, as the trail had been damaged from the snow and ice. But, we were still able to walk down into the hoodoos via the Queens Garden Trail.

The start of Queens Garden was quite icy, but fortunately, we came prepared with crampons and hiking poles, which made the experience much more pleasant. Our entire group was in awe as we descended into the canyon, surrounded by spire rock formations. I found myself pulling out my camera every few minutes to take photos, and had to be reminded several times that we did not have all day!

Surrounded by hoodoos on the Queens Garden Trail

Also – it was a lot warmer than we anticipated. While I had activated my hand warmers on the drive into the Park, I did not actually need them. The sun was shining, and there was no wind chill, which made for a perfect hiking experience. Overall, we left Bryce Canyon feeling very grateful for an incredible outdoor experience.

Views from the Queens Garden Trail

Capitol Reef National Park

We left Bryce Canyon around lunch time to start driving towards our next Airbnb in Monticello, which was about five hours away. On the way to Monticello, we would be passing through Capitol Reef National Park, and wanted to ensure we completed the top-rated trail in the park: Hickman Bridge.

While Justin and I were on our Yukon trip, I made a comment about wanting to get a mountain photo from the middle of the highway while we were driving from Skagway to Whitehorse. However, the road was not straight, and we did not feel that there were any safe opportunities to capture this moment.

But, we were able to make this vision come to life while approaching Capitol Reef National Park. As we were driving down the (straight) highway, we could see the rock formations in the distance, and there was even a pull-off on the side of the road. Justin, Iwona and myself all got out to take photos, while Craig kept an eye out for cars. Iwona and I even attempted to get some photos of us jumping on the road, which was quite the adrenaline rush – this took several attempts, and we had to run off the road a couple of times as vehicles started to approach!

The view from the highway, as we approached Capitol Reef National Park

The Hickman Bridge Trail is quite short (a little over 2.5km) and was very busy when we arrived. We very much enjoyed our walk towards the bridge, as we encountered beautiful landscape scenery along the way and were also able to admire a primary Capitol Reef landmark – Pectols Pyramid.

Views of Pectols Pyramid from the Hickman’s Bridge Trail
Hickman’s Bridge

I came up with a theory on our walk that the Park must be named “Capitol Reef” as many of the rock formations had holes that made it look like coral reef… but a quick Google search has proven my assumption to be incorrect. According to the USA National Park Service, the name was chosen as the rock formations in the Park look similar to the Capitol building in Washington, DC. I was close… ツ.

The scenery we were surrounded by while on the Hickman’s Bridge Trail

While we barely scratched the surface of what this beautiful park has to offer, I am thankful we were at least able to sneak a preview during our trip, and look forward to doing more exploring here in the future!

Always grateful,

Michelle

Las Vegas & Zion National Park (Utah Road Trip – Part 1 of 3)

Justin and I just got back from a week long road trip through Utah with our friends Iwona and Craig – no better time to write this blog than now, while everything is still fresh in my head ツ.

We started our trip with two nights in Las Vegas (I had never been before), followed by visits to each of the five National Parks in Utah: Zion, Bryce Canyon, Capitol Reef, Arches and Canyonlands. In this blog, I will focus on the first two parks, and then cover the other three in Part 2.

Las Vegas

I think we can all agree that my first time in Las Vegas was well overdue – many people go for their 21st birthday, but that was a “few” years ago for me ツ. While we were flying over Las Vegas, Justin pointed out the Strip from the plane, and it appeared small and underwhelming, but I guess everything looks small when you are that high up – the Strip is actually huge!

After making a quick stop at Trader Joe’s and checking into our Airbnb, we got changed and were ready to hit the Strip. The first hotel we checked out was Caesar’s Palace, and I could not believe how big this single hotel was – within the first 30 seconds, I knew that I had made the wrong shoe choice for the evening (but thankfully, I brought backup sneakers). Over the next two days, we also walked through the Bellagio, the Venetian, New York-New York, Excalibur and the Luxor.

In terms of activities, our crew kept it pretty light on gambling – a bit of Blackjack and Buffalo Gold slots. Justin and I had no luck on slots, but fortunately, Craig had better luck at the Black Jack table.

While we did not see any shows, we did check out a Vegas Golden Knights hockey game which was a lot of fun – awesome pre-game introduction, high-energy atmosphere, and a Knights win to top it off!

After the hockey game, we made our way over to New York-New York to ride the Big Apple Coaster – I usually love roller coasters, but this one was not my cup of tea! It took absolutely forever to climb the first hill – building a bit too much suspense – and after that, we were upside for what felt like half the ride… my apologies to anyone who suffered hearing damage due to my constant screaming. Everyone else had fun, but it was a bit too wild for me ツ.

Overall, I had a great first experience in Las Vegas. When they say “Vegas doesn’t sleep” – I get it now, because even I got barely any sleep!

Las Vegas Strip at night

Getting to Zion National Park

The drive from Las Vegas to our accommodation in Hurricane (which is about 30-minutes outside of Zion) was supposed to be two hours, but we somehow managed to stretch this into 12-hours, as we made a couple of stops along the way.

Our first stop was the Valley of Fire State Park in Nevada. As the name suggests, this landscape was filled with red rock formations, and it was incredibly warm! We stopped at the Beehive Rock Formations and Elephant Rock, and also saw some petroglyphs.

Beehive Rock Formations at Valley of the Fire State Park
Petroglyphs (historical rock carvings) at Valley of the Fire State Park

After leaving Valley of Fire, we got back on the freeway, only to encounter a one-and-a-half hour delay due to a vehicle collision that resulted in two vehicles catching on fire. We hope everyone in the incident is doing okay and recovering well.

We continued on our way, crossing the state line into Utah, and wanted to make a quick stop in St. George to see the Temple before continuing to Hurricane. However, our quick stop turned into several hours as we ended up watching the most incredible sunset, had dinner and craft beer at Hive 435 Tap House (the Utog Son of a Peach was really good) and stopped for dessert at Pinkbox doughnuts. We made it to Hurricane, eventually ツ.

The most incredible sunset I have ever seen – in St. George

Zion National Park

Prior to our trip, each of us took on the task of researching one park to ensure we were using our limited time wisely and fitting in top recommend hikes and sights. I was responsible for learning about Zion, and there were three hikes that I had listed on my “must-see” list: The Zion Narrows Riverside Walk, Scout’s Lookout and Emerald Pools Trail.

However, the most popular hike in Zion is called Angel’s Landing. This is considered to be a very difficult trail, as there is a narrow stretch that requires you to pull yourself up using chains. Access to this trail is through a lottery permit system, and unfortunately for us, Angel’s Landing was closed for maintenance during the days we were at the Park.

Before I get into the details of the actual hikes, I want to discuss the “setup” and logistics of Zion. There is one main road that runs between the canyon walls – it is 24kms long and includes nine stops. Between March and November (peak visitor season), shuttle buses starting at the Visitor Centre will take you to each of the stops, as vehicles are not allowed to drive through the Park. I believe during the off season, visitors will rent bikes to get around. Fortunately, the shuttles come by every few minutes, so you are never waiting very long for a ride, and many of the drivers will narrate interesting facts about the Park as they drive ツ.

One other quick tip for anyone who is reading this post – unless you get to the Park very early, you are likely going to be waiting in a slow, long lineup to get to the parking at the Visitor’s Centre. The parking here is free, but depending on what time you arrive, you could be waiting a while. There are other lots you can park in leading up to the Visitor’s centre, as well as street parking, but it will cost around $20-30 USD.

Moving onto the hikes! The Zion Narrows Riverside Walk was the first trail we completed. This is an easy, paved trail that takes you to the start of the Narrows, which is another famous part of Zion. The Narrows is a slot canyon that you can hike through, but it requires walking through the Virgin River. Unfortunately (again), the river was too high during our visit and the hike through the Narrows was closed, but at least we were able to see the beginning of the narrowest part of the Park.

The start of the Narrows along the Riverside Walk

Following the Riverside Walk, we quickly stopped for lunch at the Zion Lodge before heading to our next hike – Scout’s Lookout. In order to get to this viewpoint, you actually walk along the West Rim Trail, which is also mostly paved (similar to Riverside Walk); however, it is a series of uphill switchbacks to get to the top. Our first day in Zion was particularly windy, and when the wind blew, so did the sand. There were a handful of times where we had to stop walking, cover our faces to prevent sand from getting into our eyes and mouths, before we could keep going.

The switchbacks going up/down to Scout’s Lookout

When we made it to the end of Scout’s Lookout, we were pleasantly surprised to see a family of deer grazing amongst the shrub! It is at this point, as well, where the West Rim Trail splits – you can either hike to Angel’s Landing (you can actually see the top of Angel’s Landing from Scout’s Lookout), or you can continue walking along the West Rim Trail. Since Angel’s Landing was closed, we decided to keep going along the West Rim Trail, and it was completely worth it – the views from here were extraordinary. If you ever find yourself at Zion National Park hiking towards Scout’s Lookout, make sure to keep going!

Family of deer near Scout’s Lookout
Angel’s Landing looking mighty fine from the West Rim Trail

On our way down, the weather started to take a turn, and by the time we reached the bottom it started snowing – our timing could not have been better. At this point, we decided to head back to Hurricane to rest up and get the sand out of our hair!

We checked out of our Airbnb the next day, but wanted to fit in one more hike (Emerald Pools) in Zion before heading to Bryce Canyon. We were surprised to see that a decent amount of snow had covered the Park, but also felt very fortunate to have the opportunity to experience Zion as a winter wonderland.

Fresh snow in Zion!

The Emerald Pools Trail is a series of beautiful waterfalls, and is split into three sections – the lower, middle and upper pools. We stopped to visit each of the waterfalls, but then instead of going back the same way we came, we opted to take the Kayenta Trail to the next shuttle stop to give us the opportunity to see some different views of the park. While the views were worth it, the snow from the previous night turned this trail into a mud pit! Our way back required some careful steps as I was not super keen on getting my new hiking shoes dirty!

Upper & Lower Falls on the Emerald Pools Trail
View from the Emerald Pools Trail

I am realizing now that this blog post has gotten quite long – I guess I had more to say about Las Vegas and Zion than I thought! In that case, I will leave my write up about Bryce Canyon for the next post ツ.

Always grateful,

Michelle